While I do minimal post processing of my images, I have always performed basic lighting edits … normally adjustments to clarity, shadows and highlights. In addition I often make minor image crops. However, yesterday I decided to try Topaz AI’s Sharpen Tool (free 30 day trial), and I was positively blown away by the results. Let me stress I have ZERO financial relationship with Topaz, nor do I receive any compensation should you purchase their products. My cost for Topaz Sharpen AI was $70 (used an online coupon to slightly lower the price).
Let’s start with a screenshot of from Topaz Sharpen AI which shows a motion blurred image of mine in the process of being recovered.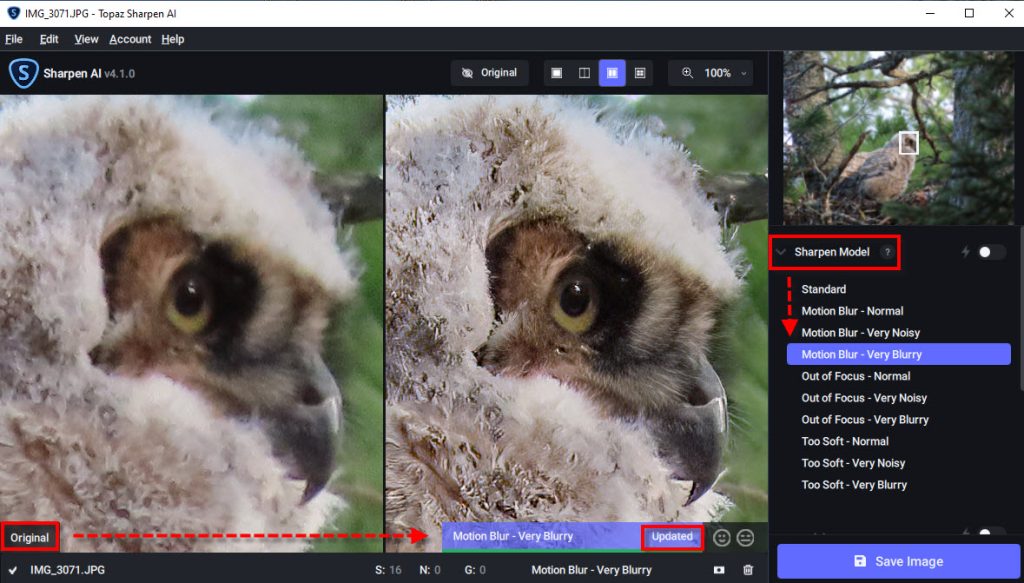
The actual editing process was easy. I selected my desired process, “Motion Blur – Very Blurry“, and then clicked “Save Image“. If the dropdown had not been blocking part of screen, you would also have seen I had pulled the AI slider to the 90% level.
Here are the Before and After Images of my owlet. No other lighting or coloring adjustments have been taken on either photograph. I suggest “right clicking” and saving the two owl images to your own computer … zoom in and really inspect the two images … toggling back and forth. I think you will be amazed. You may also download this zip file which includes the full resolution before and after photographs (54 Megabytes).
Amity Creek Great Horned Owlet
Reduced Resolution Blog Before Image … Straight Out of Camera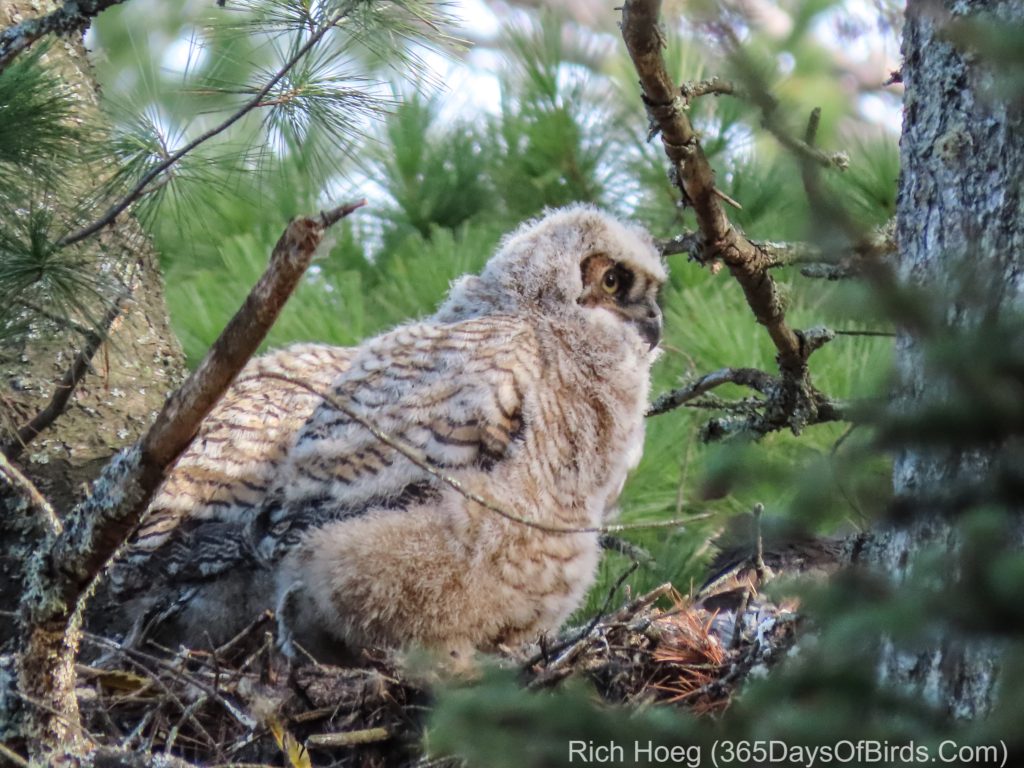
Reduced Resolution Blog After Image … Topaz AI Sharpen Motion Blur Adjustment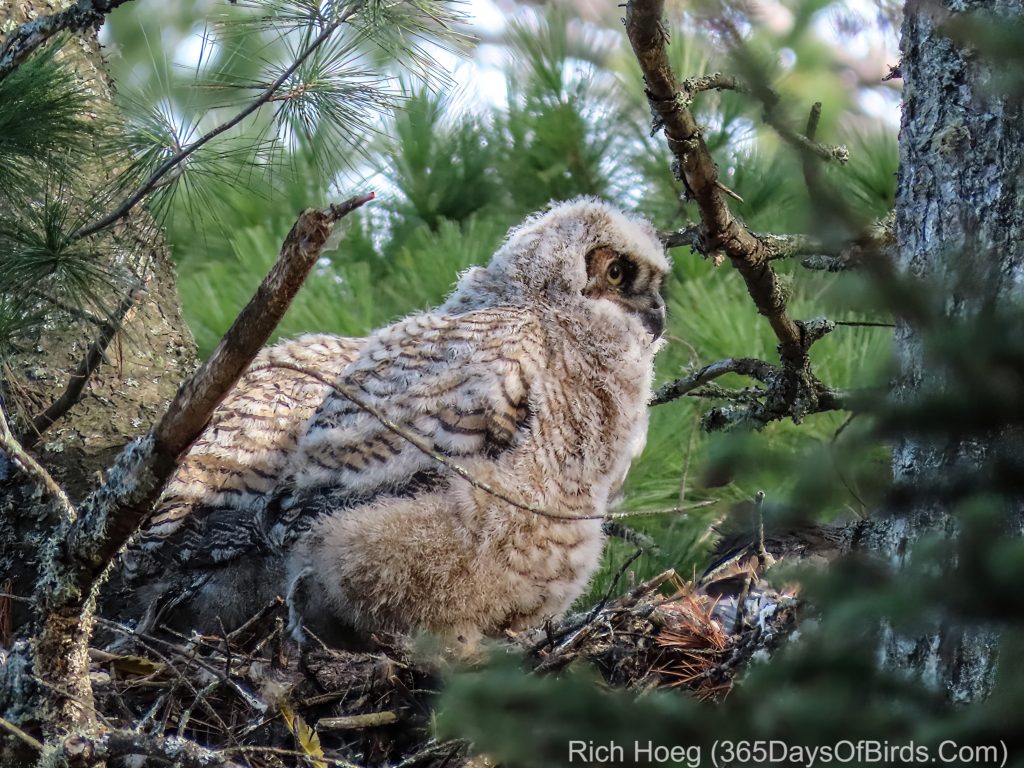
Here is a ZIp File which you may download. It includes ALL four images (owls and pelicans) … Before and After and Full Resolution. Right click while on a PC and Download Image ZIP File.
Here is the White Pelicans example. The photograph was taken this past Spring at Chambers Grove on the St. Louis River.
Reduced Resolution Blog Image: Before – Original Image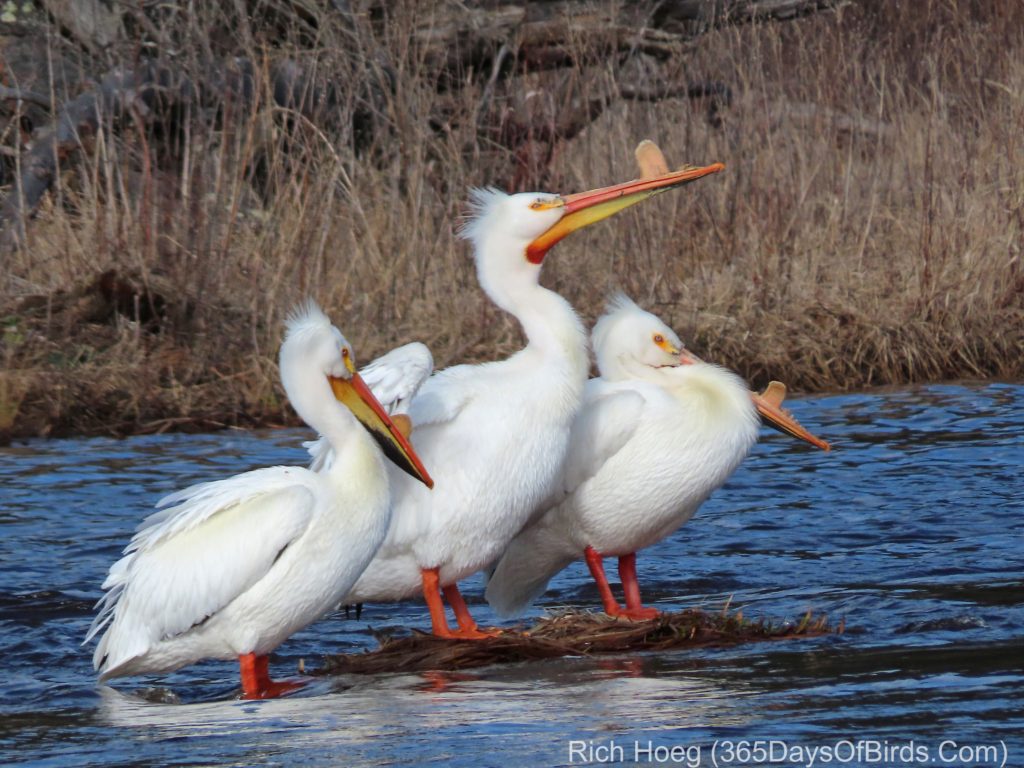
Reduced Resolution Blog Image: After – Topaz AI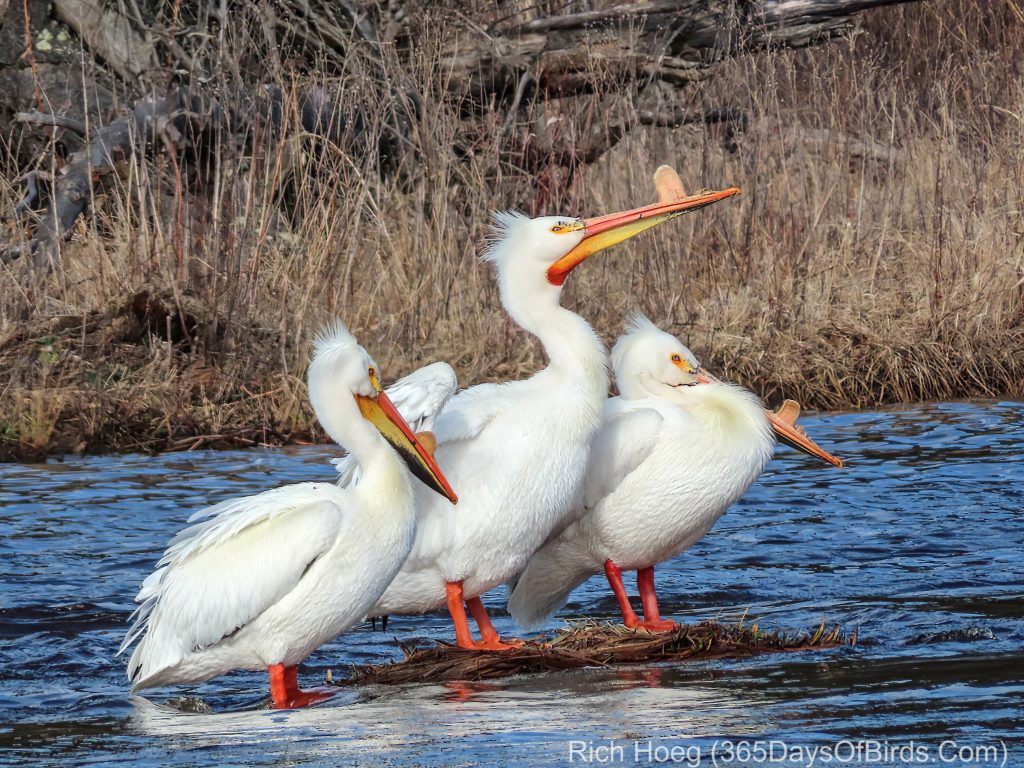
As always … here are a few important notes:
- Your results may vary!
- It makes a difference which Topaz AI Setting is chosen
- I selected: Motion Blur – Very Blurry
- I was using a Super Zoom Canon SX-70 camera. Super zoom cameras have small sensors but high zoom magnification. On bright sunny days “super zoom” cameras work quite well, but not as well in dark conditions (see my full review of the Canon SX70 camera).
- My camera was set to Aperture Priority
- I took the owl photograph in heavy shade
- ISO was hard set to 200
- Exposure was selected by the camera and set to 1/100 th of a second
- I took the pelican photograph in very early morning light
- ISO was hard set to 100
- Exposure was selected by the camera and set to 1/1000 th of a second
- A light monopod was used, but not a tripod. This helps me further stabilize the camera and is not too heavy to take along while on hikes.
- My camera selection of a Super Zoom Canon SX70 and hard setting the ISO to a very high quality (low number) level dictates that in most conditions my shutter speed may be slower than I might like. Thus, even if an image is in focus, motion blur may occur.
- Both of these photographs were taken at some distance from my car. The owl image required a longer hike on forest trails. Thus, I like Super Zoom cameras because they are light and easier to take on a hike.
- I also own and use a Sony A6300, but I tested the Topaz product on images I took with the Canon SX70. I often need the Canon’s 65x zoom (1365 mm 35 mm equivalent) to get “close enough” to the owls without spooking them.
I believe it is worth giving Topaz AI a test. The trial version inserts a watermark on top of your image, but has full capabilities. One final note: While saving an image is a time consuming task, once I determined a favorite process I could do batch edits and saves. Thus, I walked away from my computer and came back later to five saved images.
Discover more from 365 Days of Birds
Subscribe to get the latest posts sent to your email.
Topaz Sharpen is amazing – better still is Topaz Denoise for those photos using a high ISO. Best money I’ve spent.