Folks often ask me if I do post processing of my images. The answer to that question is “yes”. I try to keep my edits to a minimum, and it is also worth noting that my post processing is NOT considered “extensive” and is 100% acceptable by any major photography competitions. In other words, for any images I might choose to enter, my photographs would be considered NOT altered. Digital cameras and their sensors are amazing, but minor tweaking of photos is considered necessary and normal.
In this post I will take you through my edits. In general I am only working upon lighting. In addition, please remember one may edit an image that is slightly underexposed, but over exposed images are “lost forever”.
- Question: Why would one underexpose a photograph in the first place?
- Answer: I often underexpose for several reasons …
- Utilizing a faster exposure help avoid a blurry image (birds move fast)
- Camera sensors may overexpose colors with their auto settings, particularly white as the sun climbs higher (common problem in the winter with bright white snow)
Thus … my approach to camera settings … not right or wrong, just my approach.
- Take a photo using Aperture Priority
- Observe the exposure setting the camera chooses
- Take a photo using Exposure Priority, but with a slightly faster exposure
- Thus … this image will be slightly underexposed
- Evaluate results
- Repeat process using the lowest ISO setting possible
- Remember … lower ISO equals higher quality images
- Remember … higher ISO equals more light sensitivity (faster shutter speeds)
- Thus I am making a decision … stationary vs birds in motion (or animals)
- I do NOT take photographs using Camera RAW
- Many photographers would disagree with this approach
- I like turning Camera RAW off. It almost doubles my burst exposure mode.
- Their is a HUGE difference between 7 and 12 frames per second.
- With birds photography, the quick movements and light angles change so fast.
- Having an extra five images captured per second is important.
On to the image editing. Please note many people use other software tools such as Lightroom, Photoshop, etc. The edits I am making could be accomplished easily in any of these tools. I like to use Photoshop Elements. The cost is much lower that Photoshop, and you can accomplish 85% of the edits capable in Photoshop. Given my approach of limited post processing, Photoshop Elements works for me.
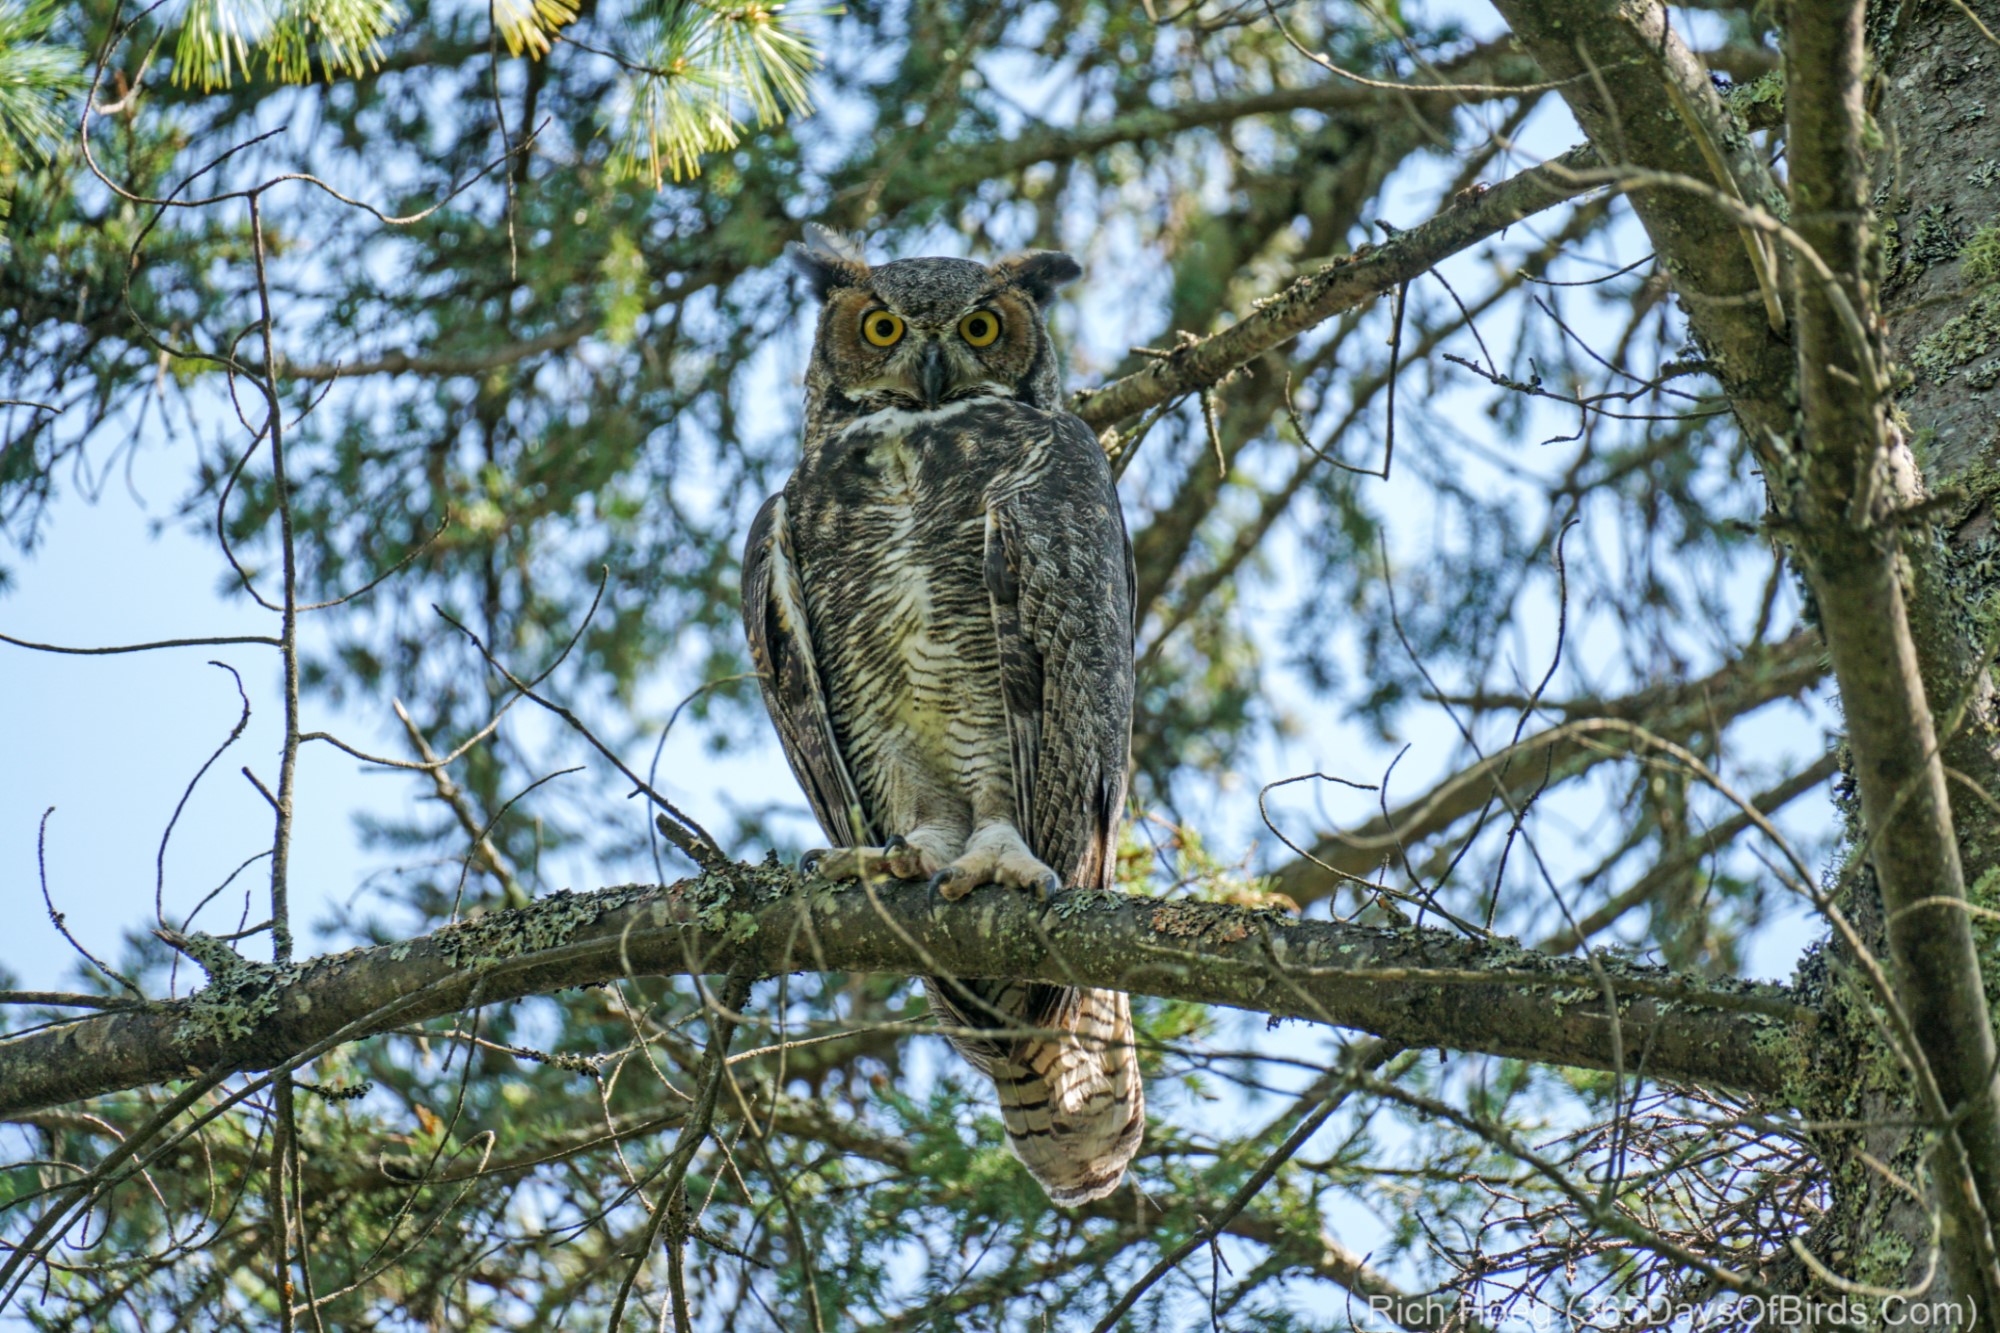
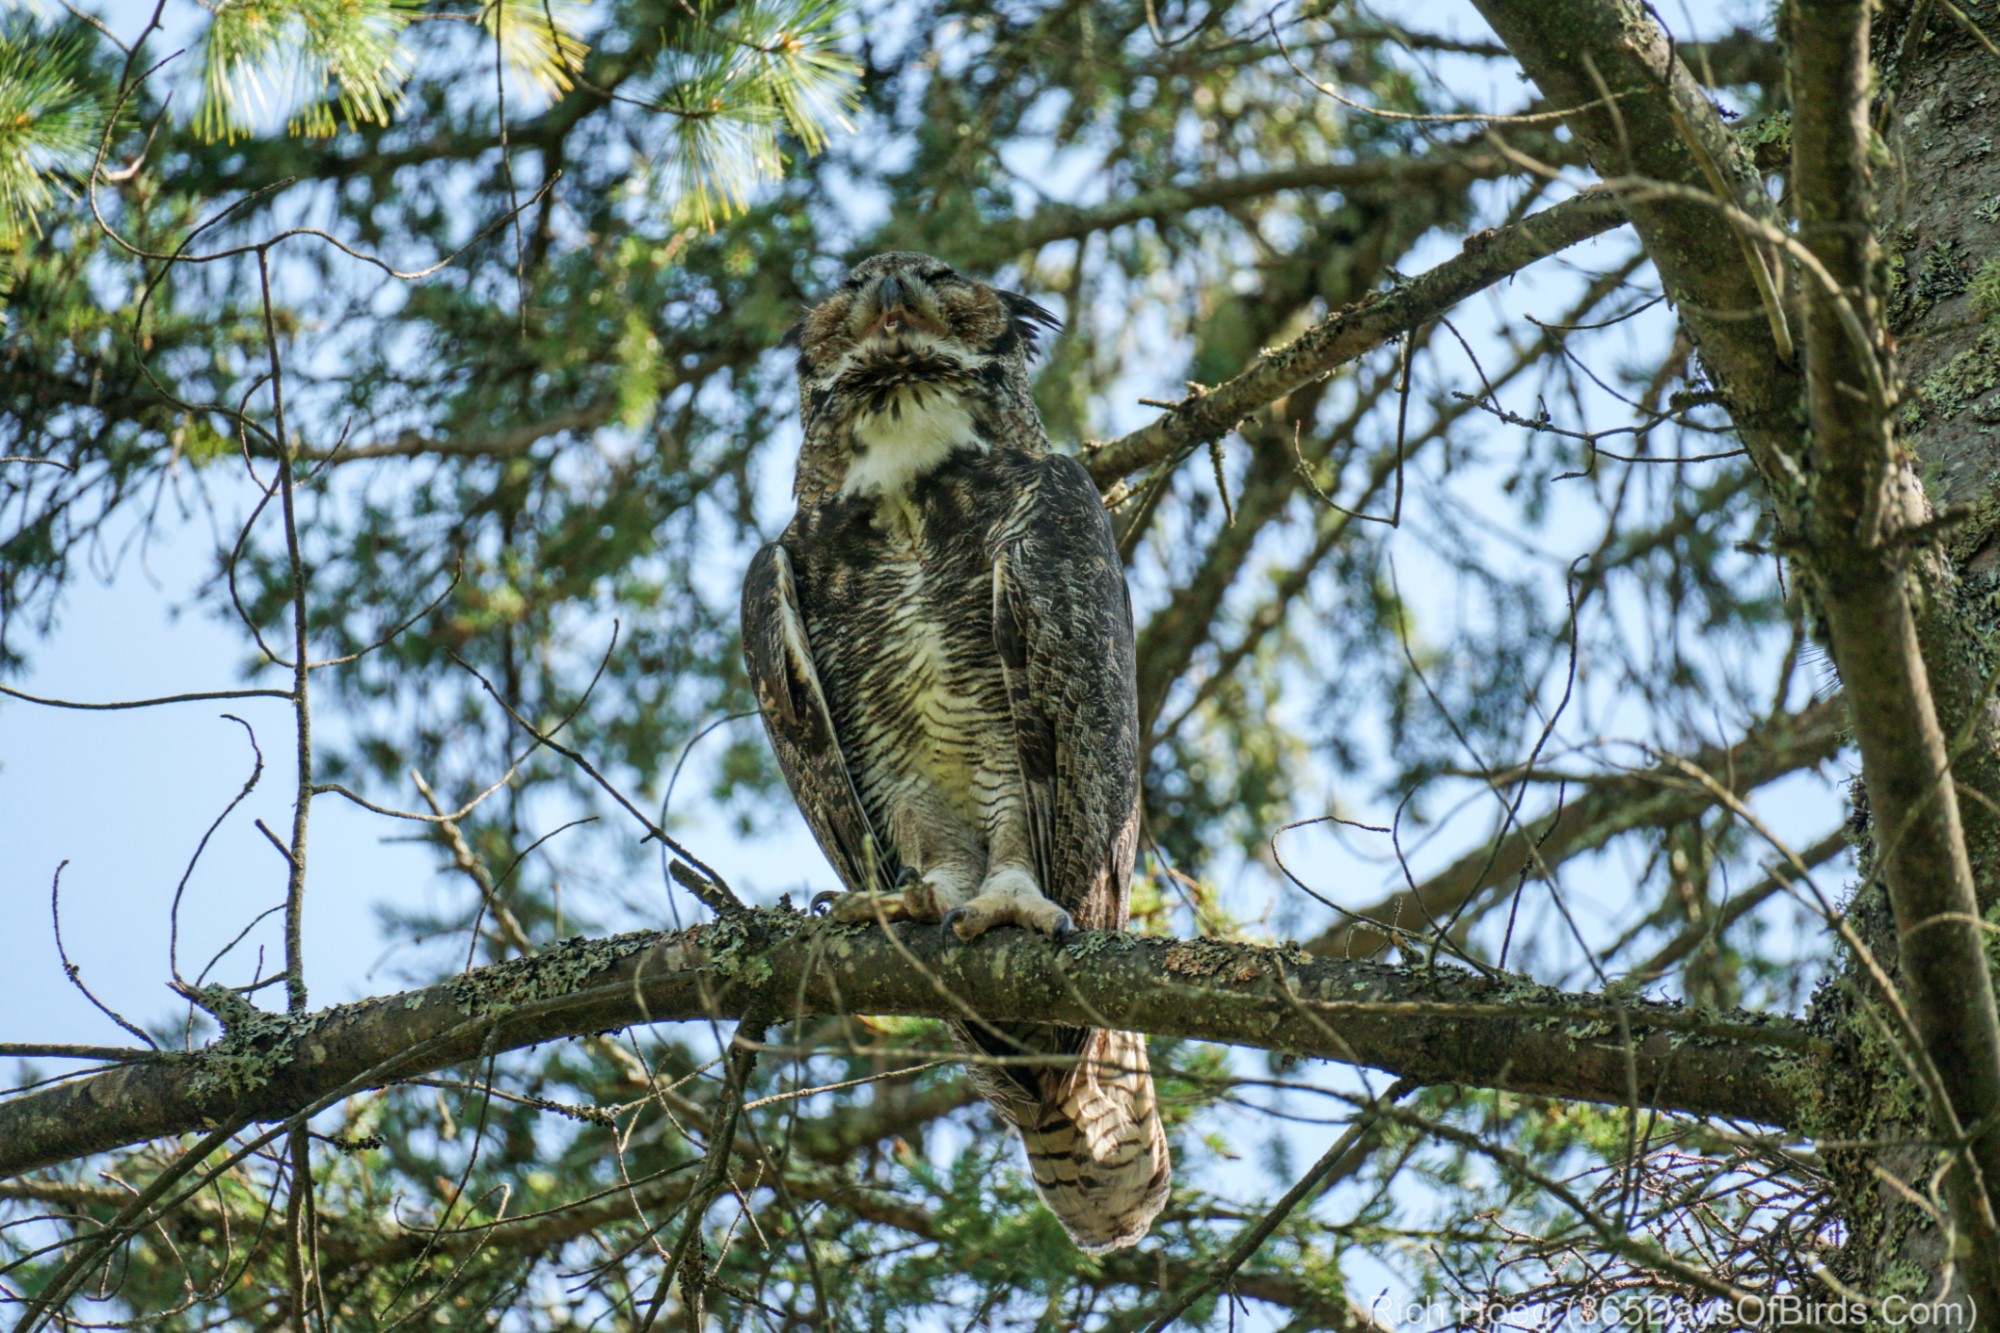
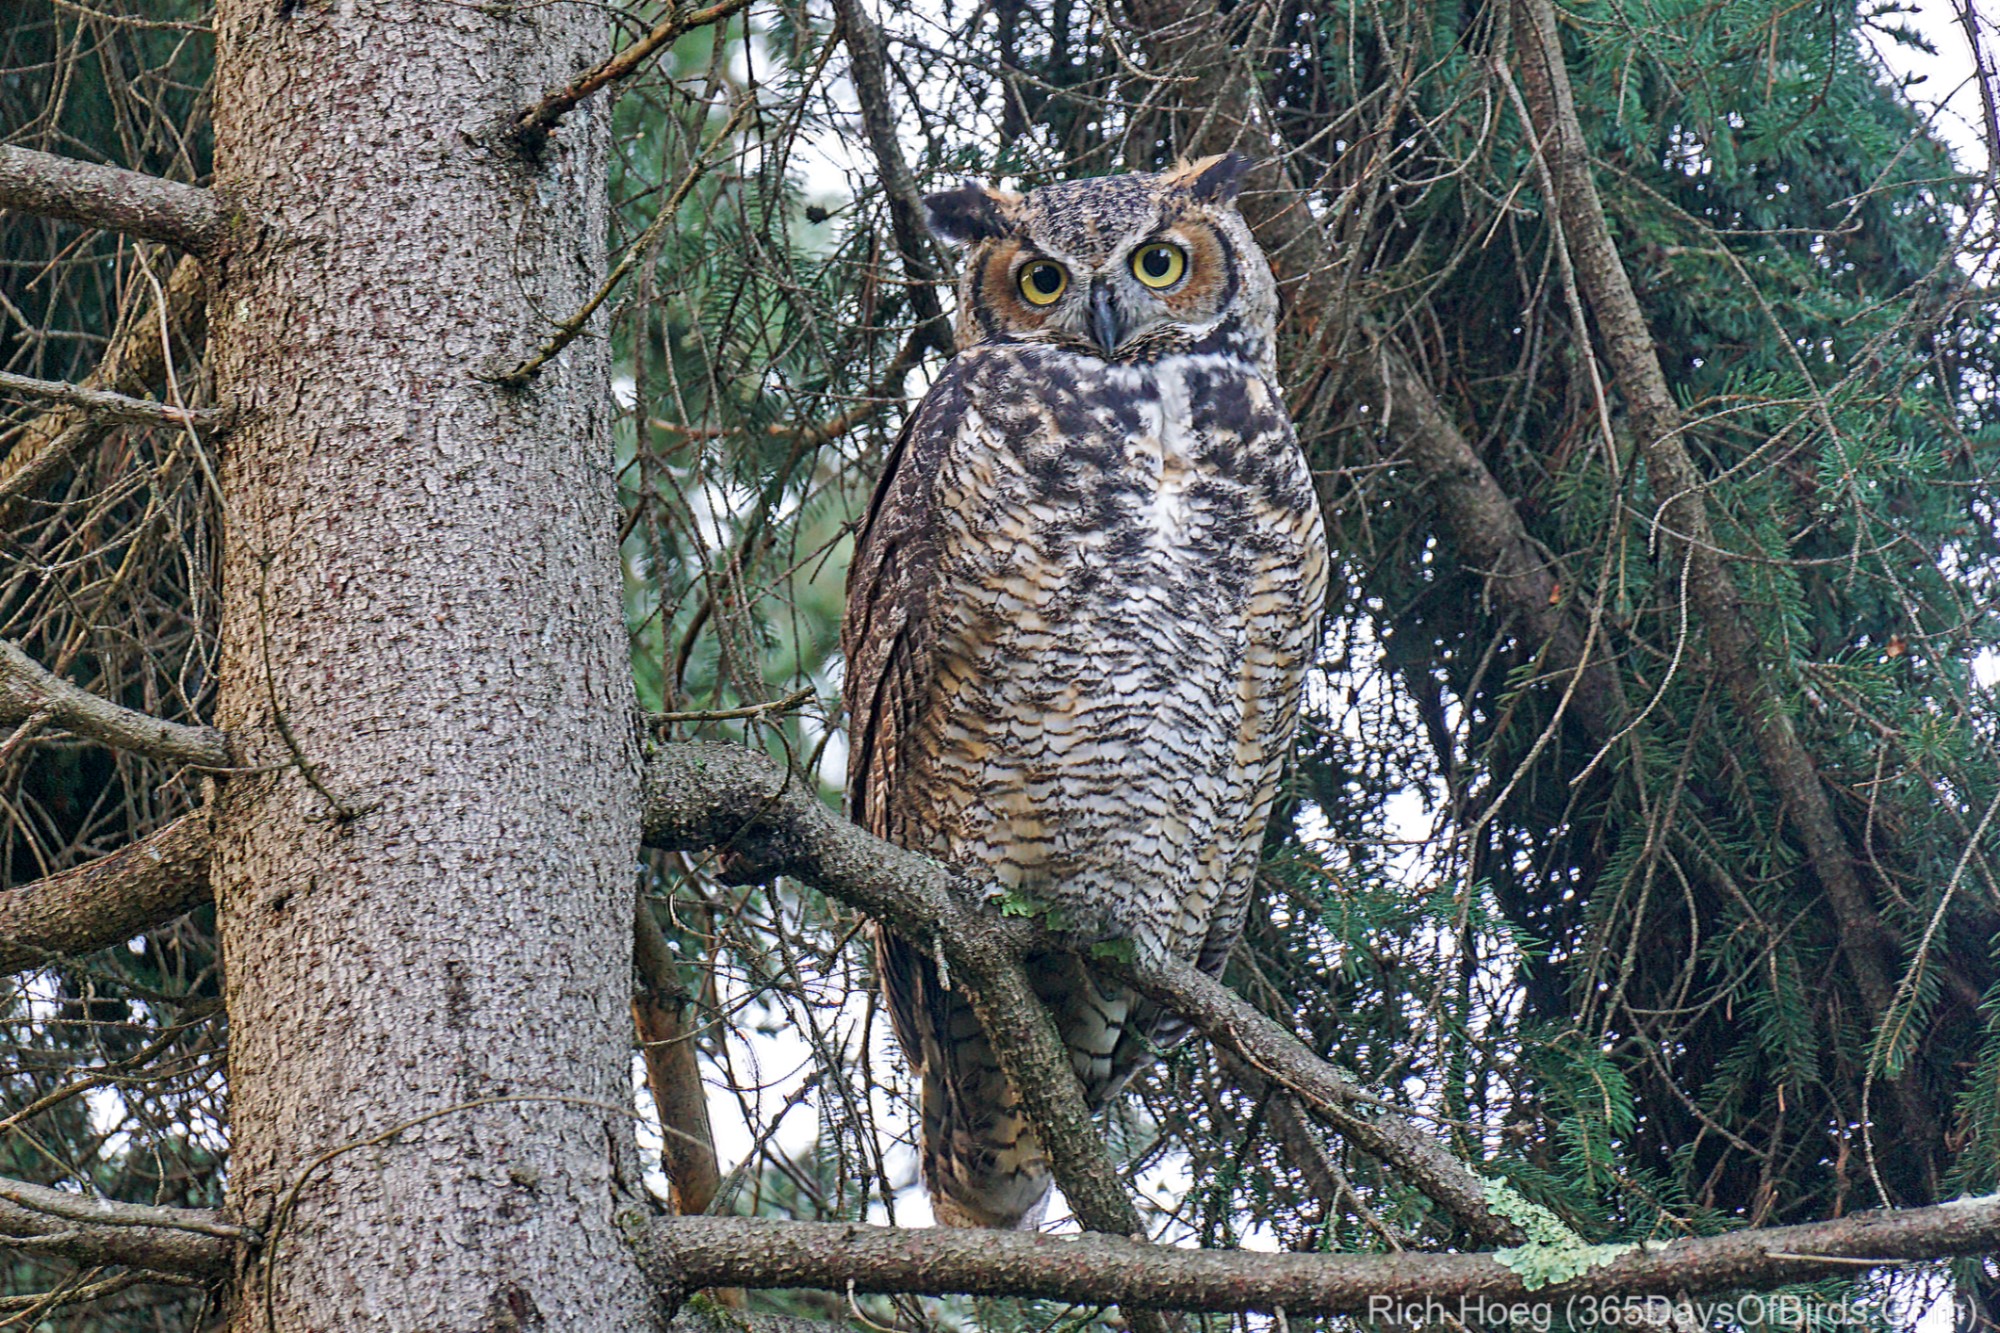
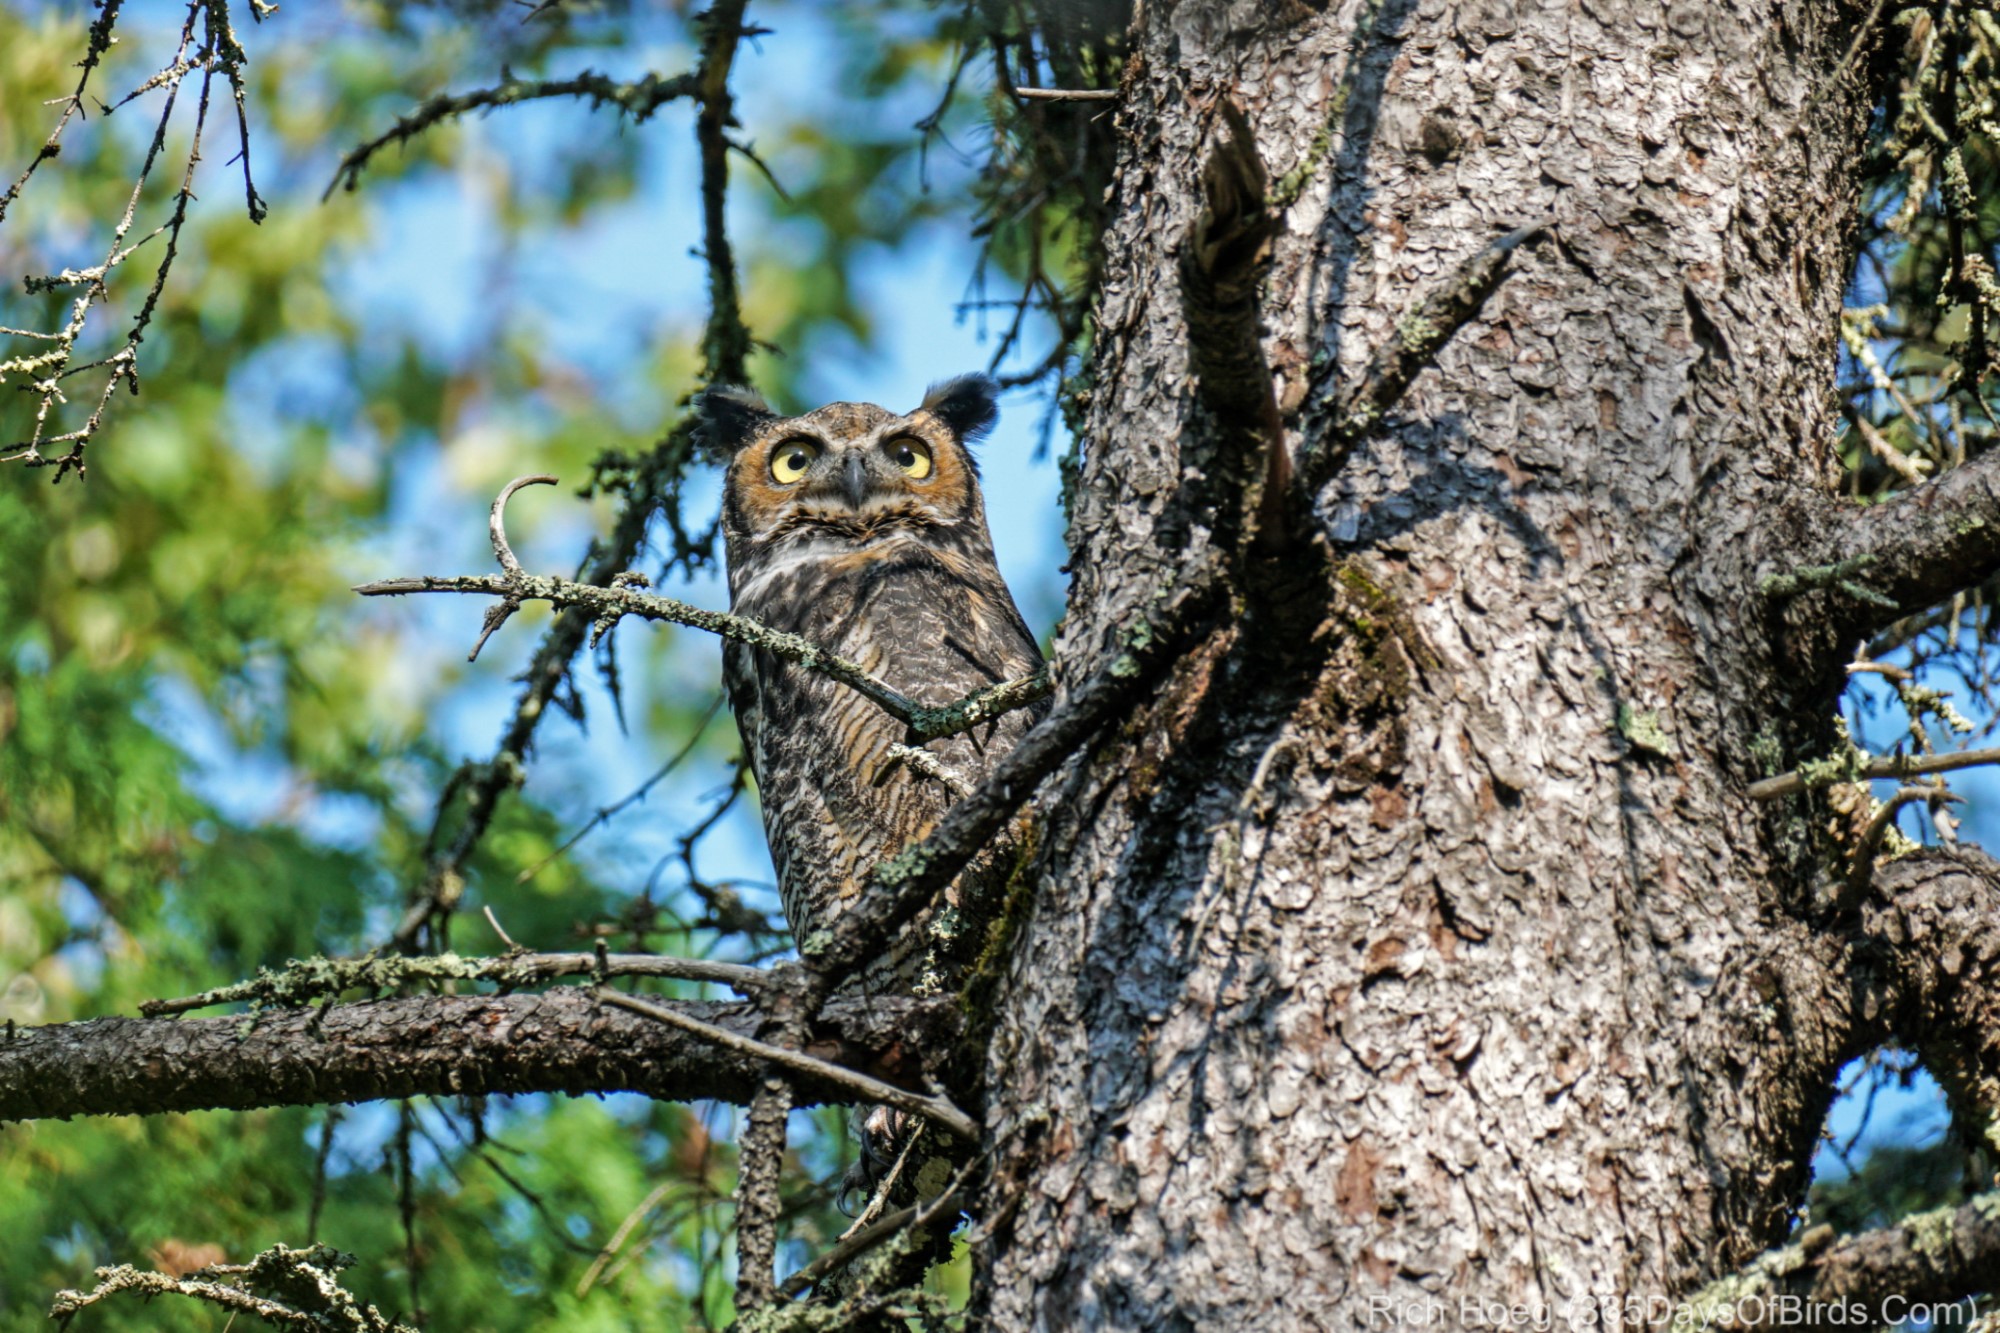
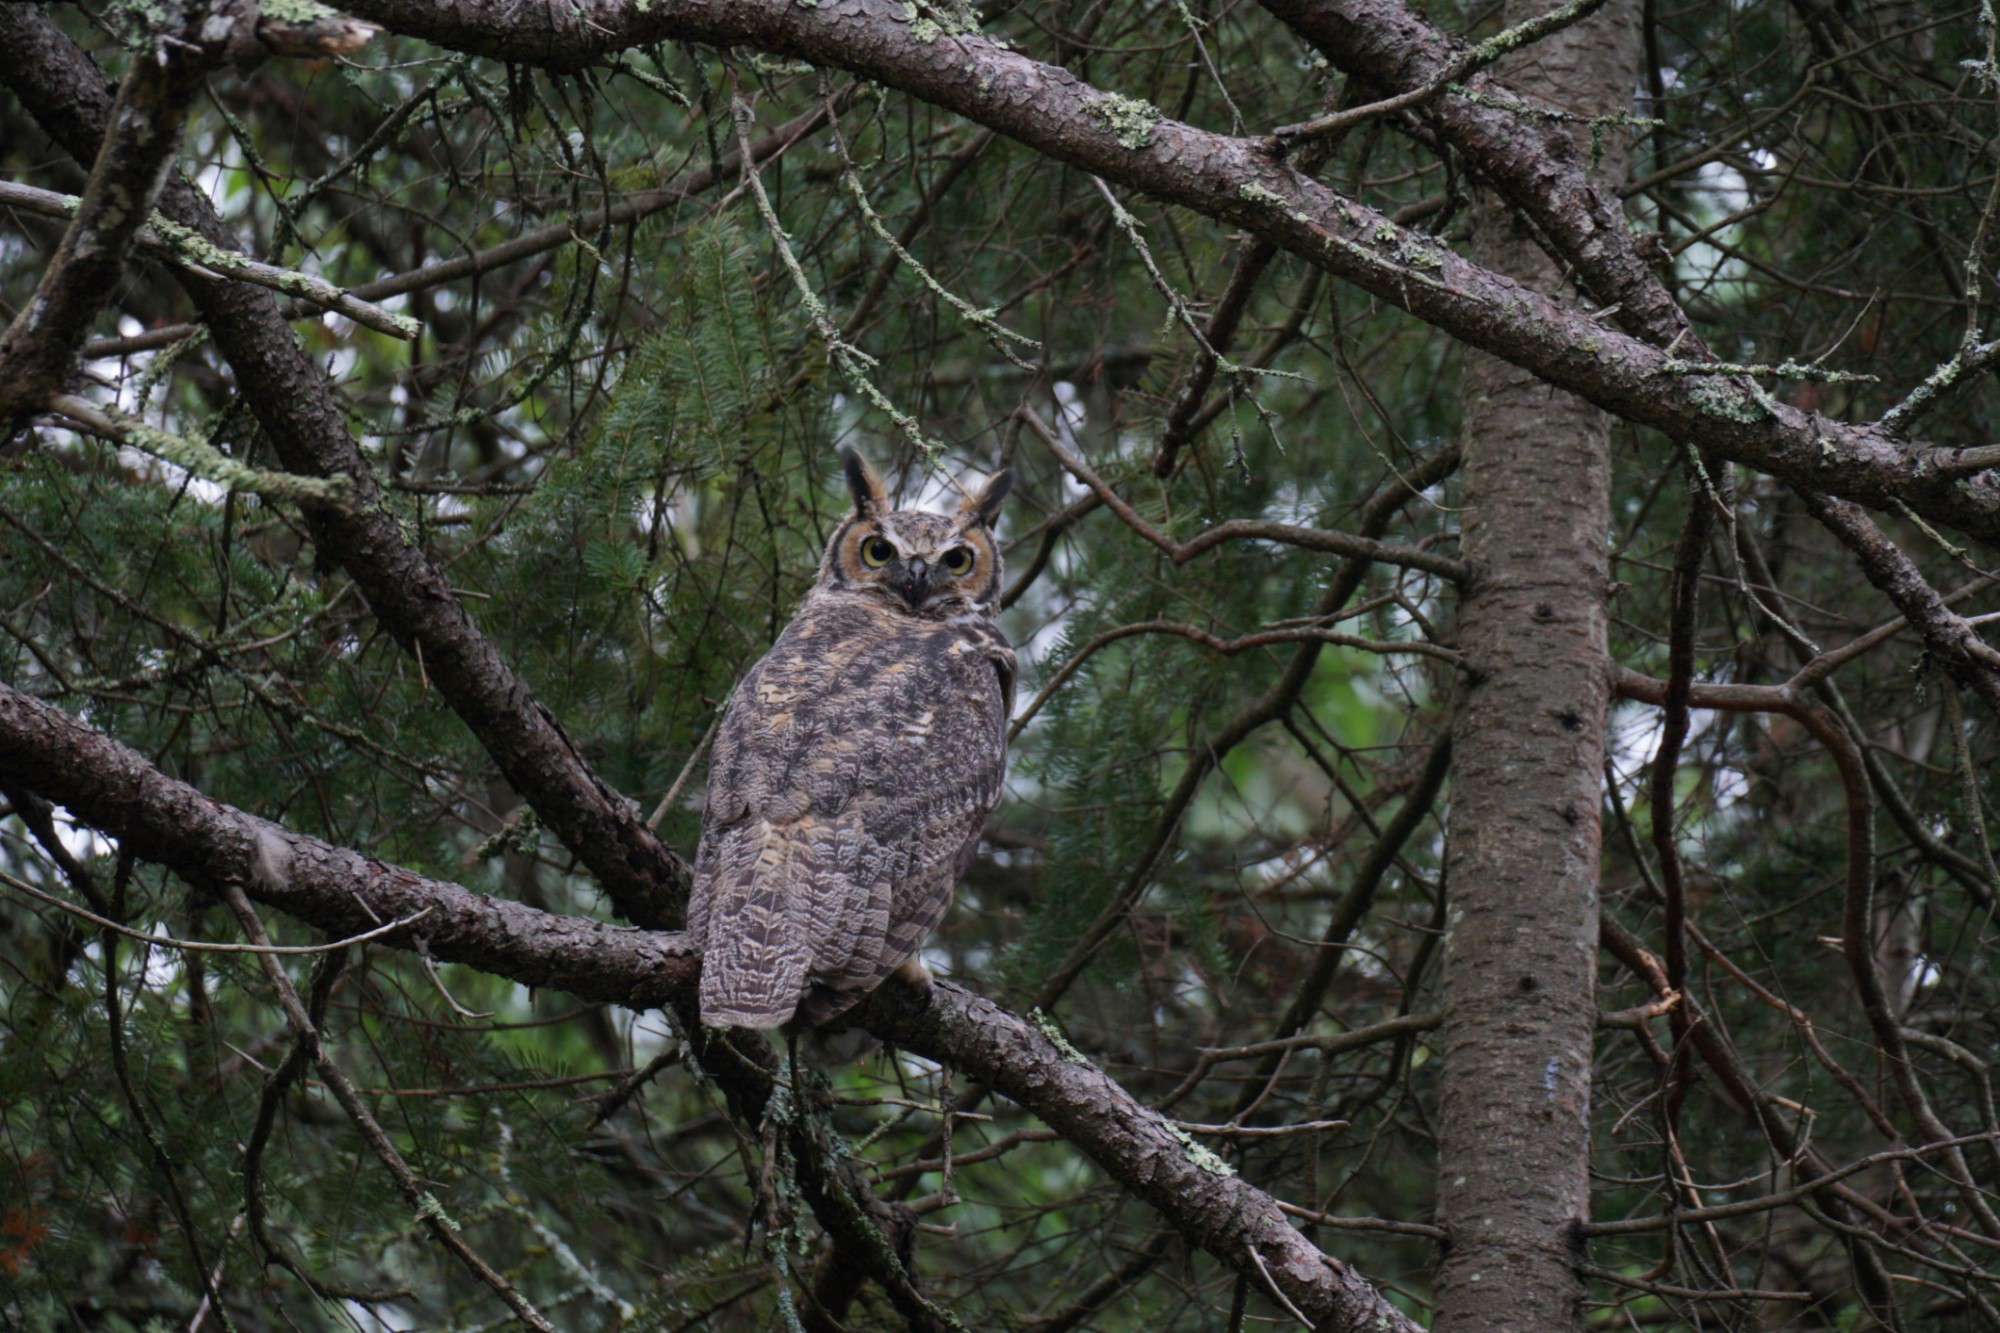
Hoot, the Great Horned Owl
Note #1: Camera Settings – ISO = 640; Aperture = 6.3; Exposure = 1/50th of a second
Note #2: I took this photograph in the deep forest a bit after 8 am on a cloudy day. Thus, the conditions were rather dark. An exposure setting of 1/50th of a second works for an owl, and remember I am using burst mode. Thus, I am able to throw out blurry photos. Obviously my preference would be to have bright sun which would allow for a low ISO and a fast shutter speed (1/1000th of a second??). However, in those conditions it is unlikely my owls friends would have been awake and hunting.
Note #3: Right click upon any image to download. Compare full resolution Before and After by toggling back and forth
Note #4: If you want to compare the full, VERY large files, follow the link by each image to my Flickr account. My blog software does not allow me to upload 20 meg files (approximate size of high resolution images). I had to reduce the size of these images for publishing.
Before Image (non processed … Sony A6300) (Flickr High Res Link)
After Image (after the edits reviewed below) (Flickr High Res Link)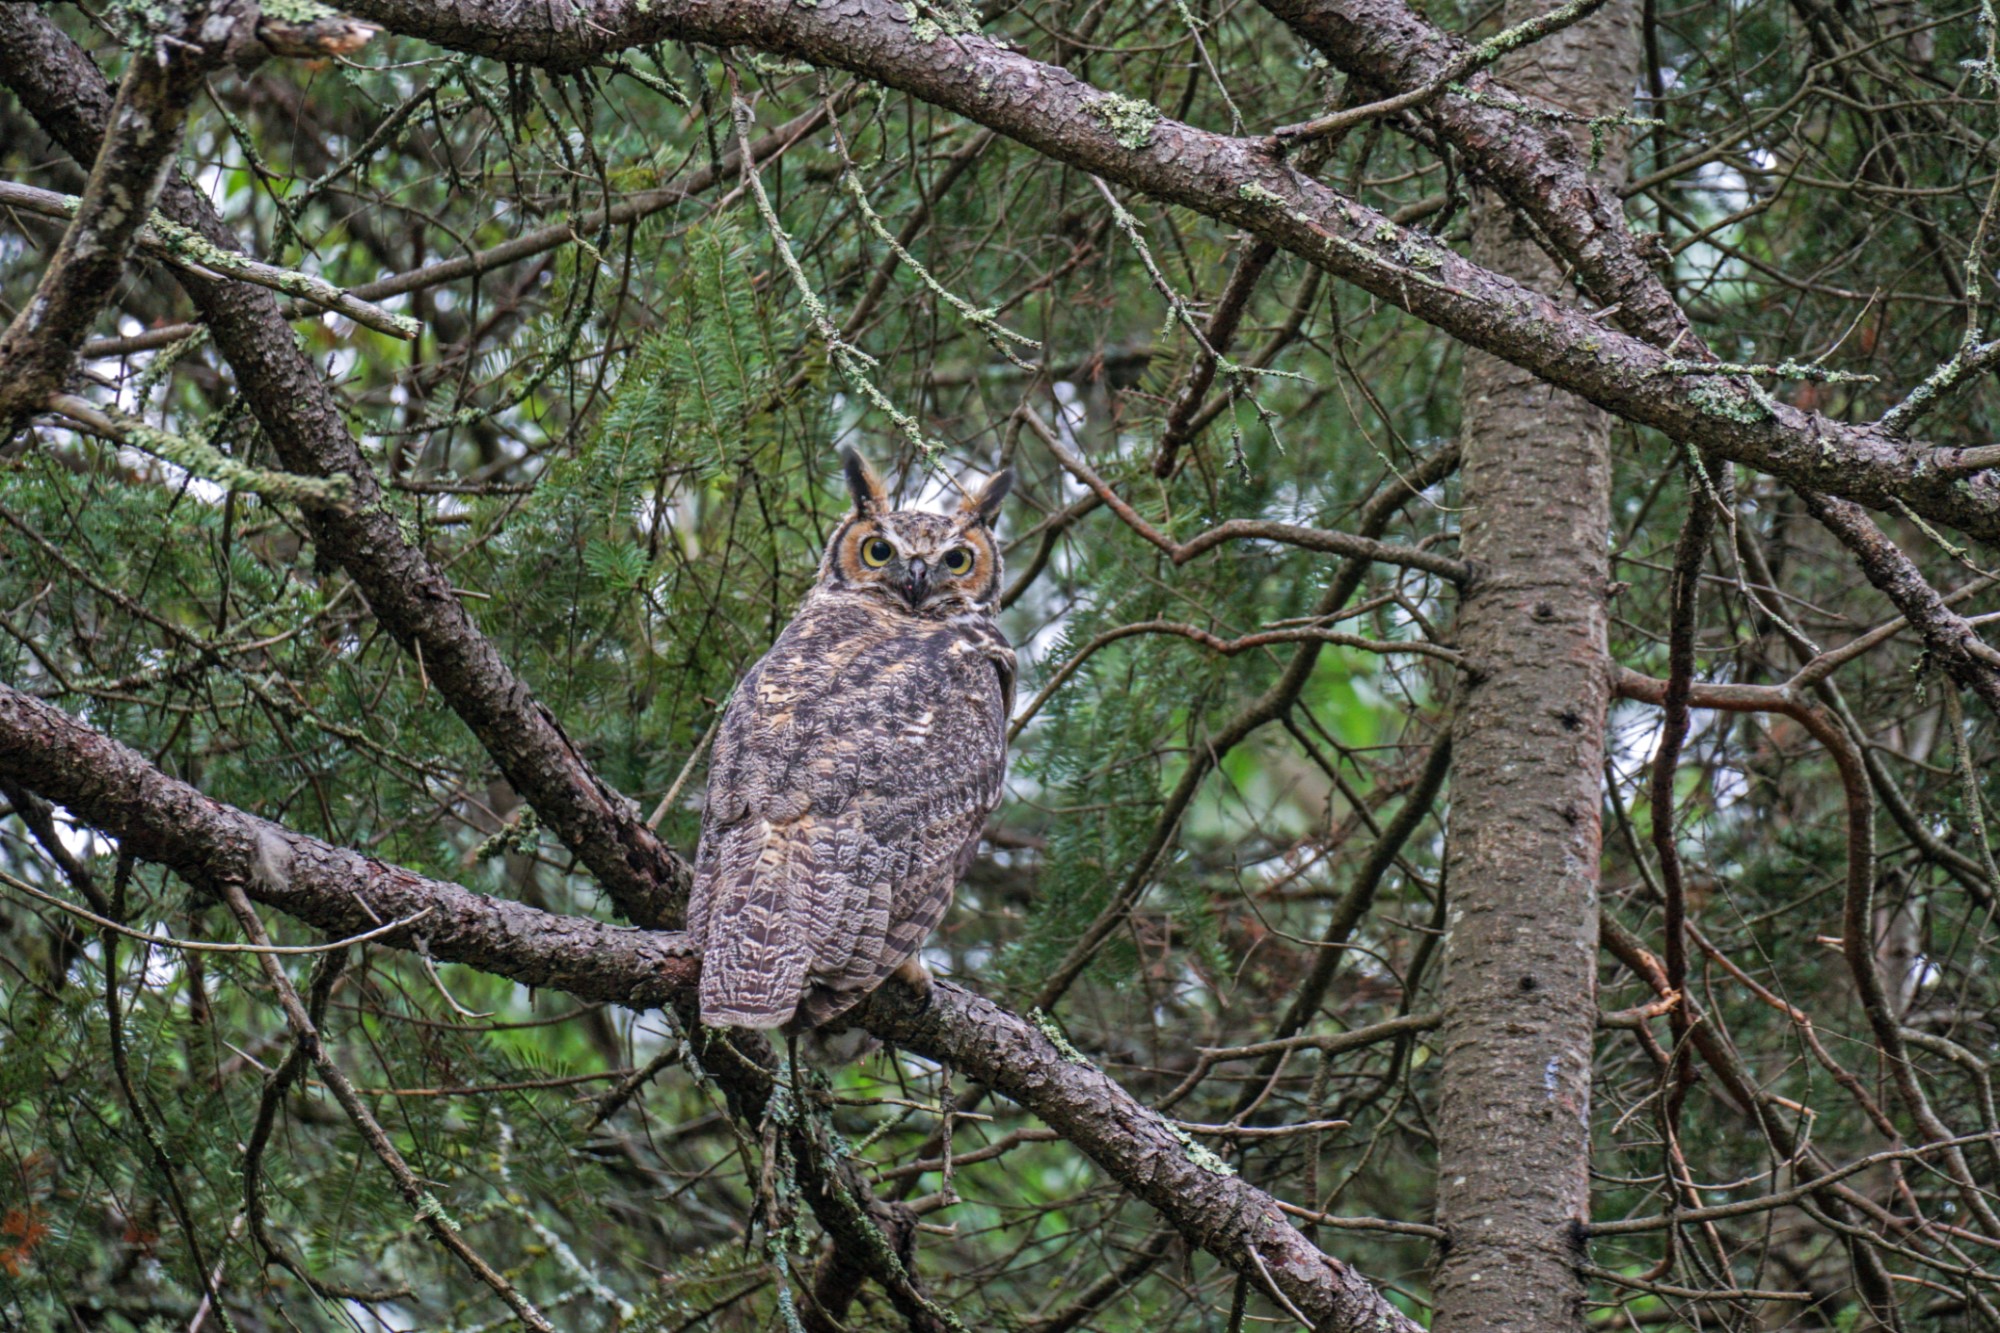
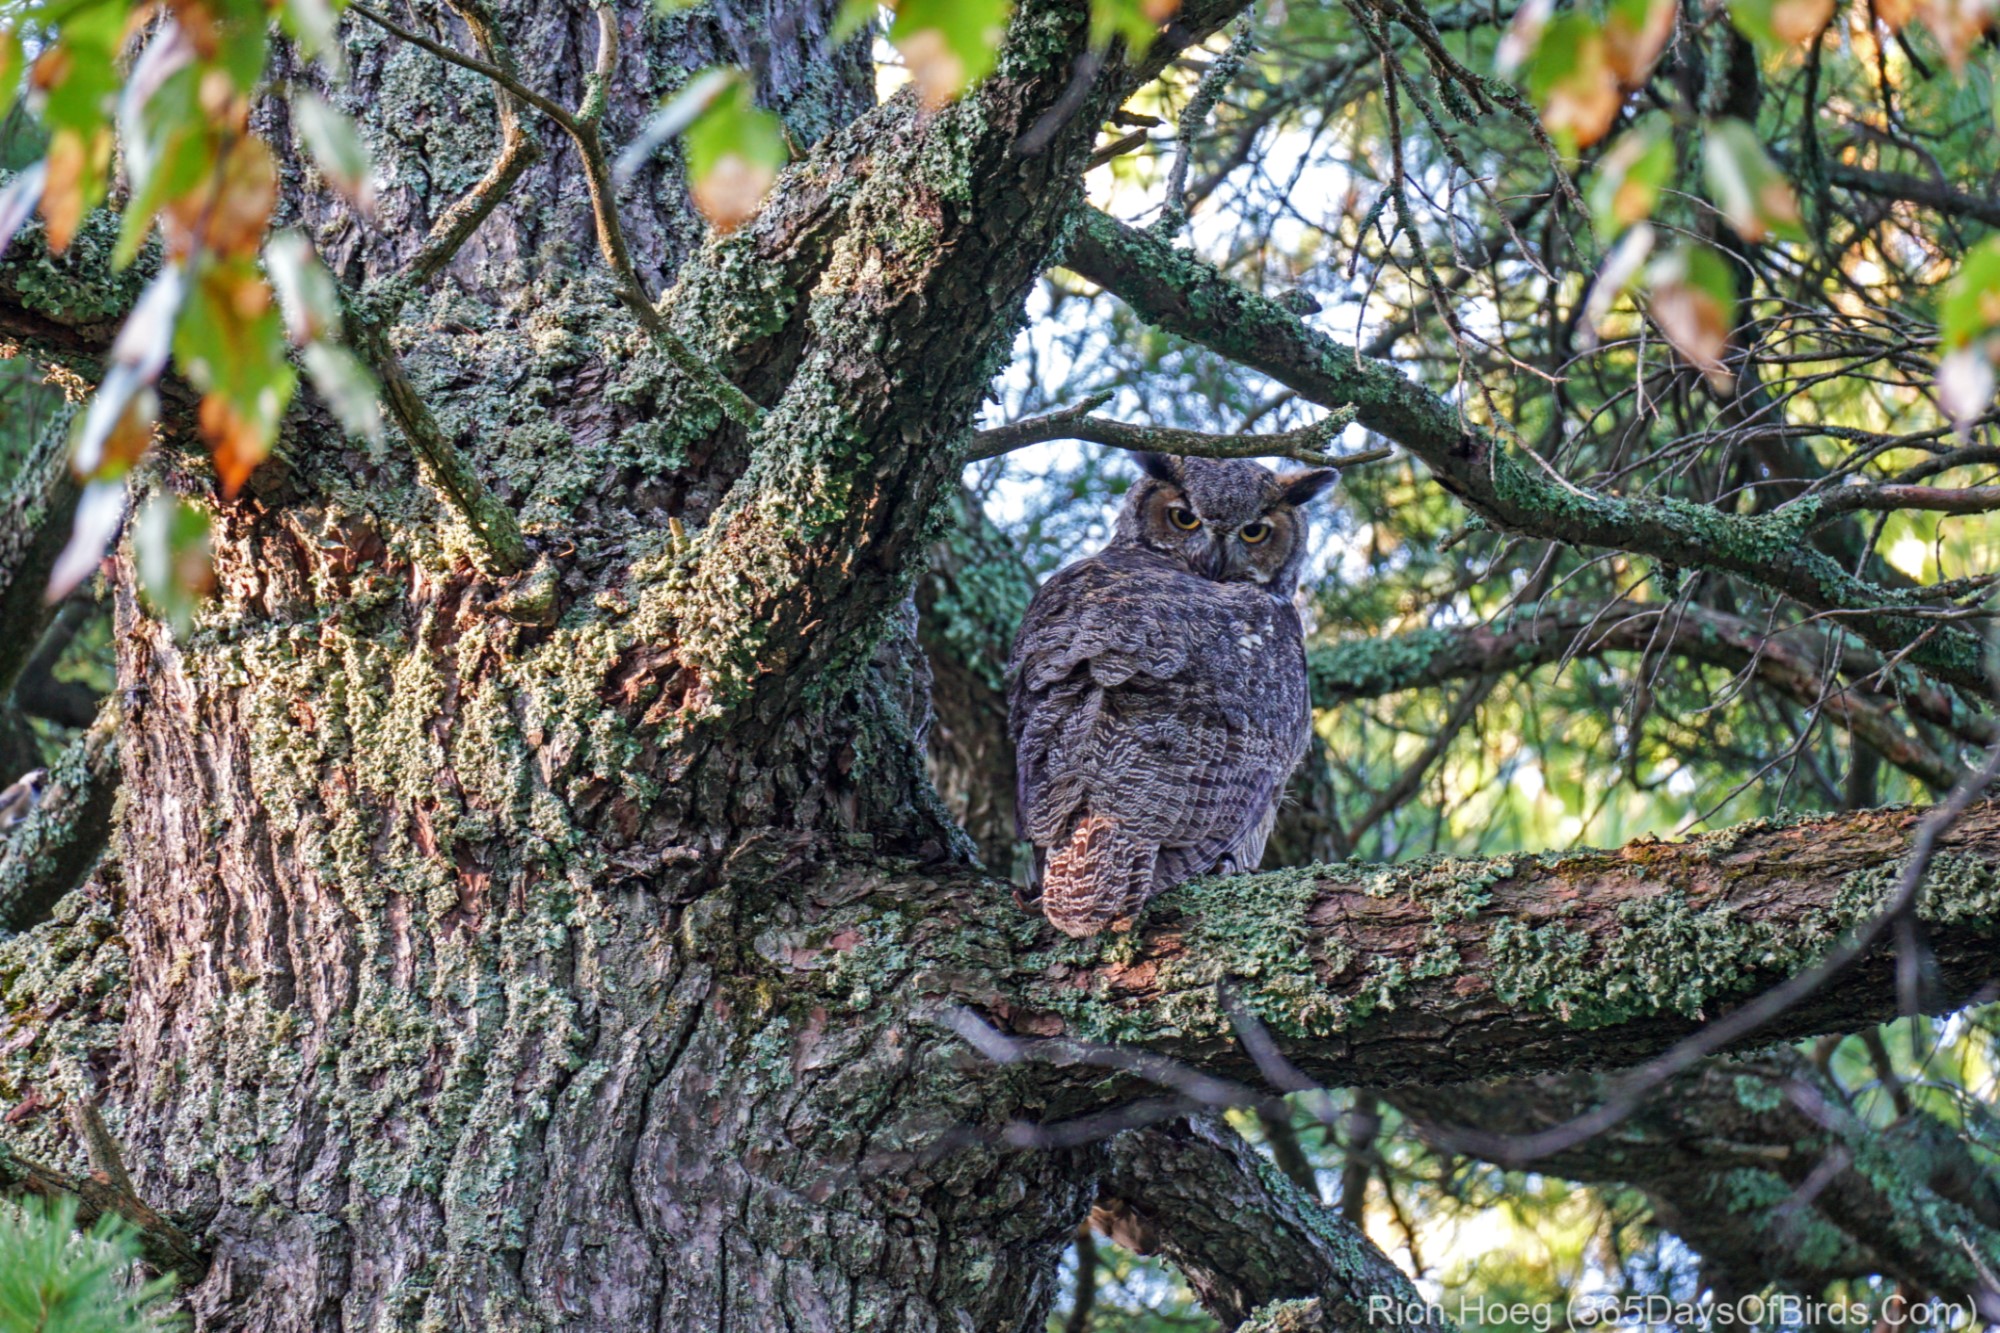
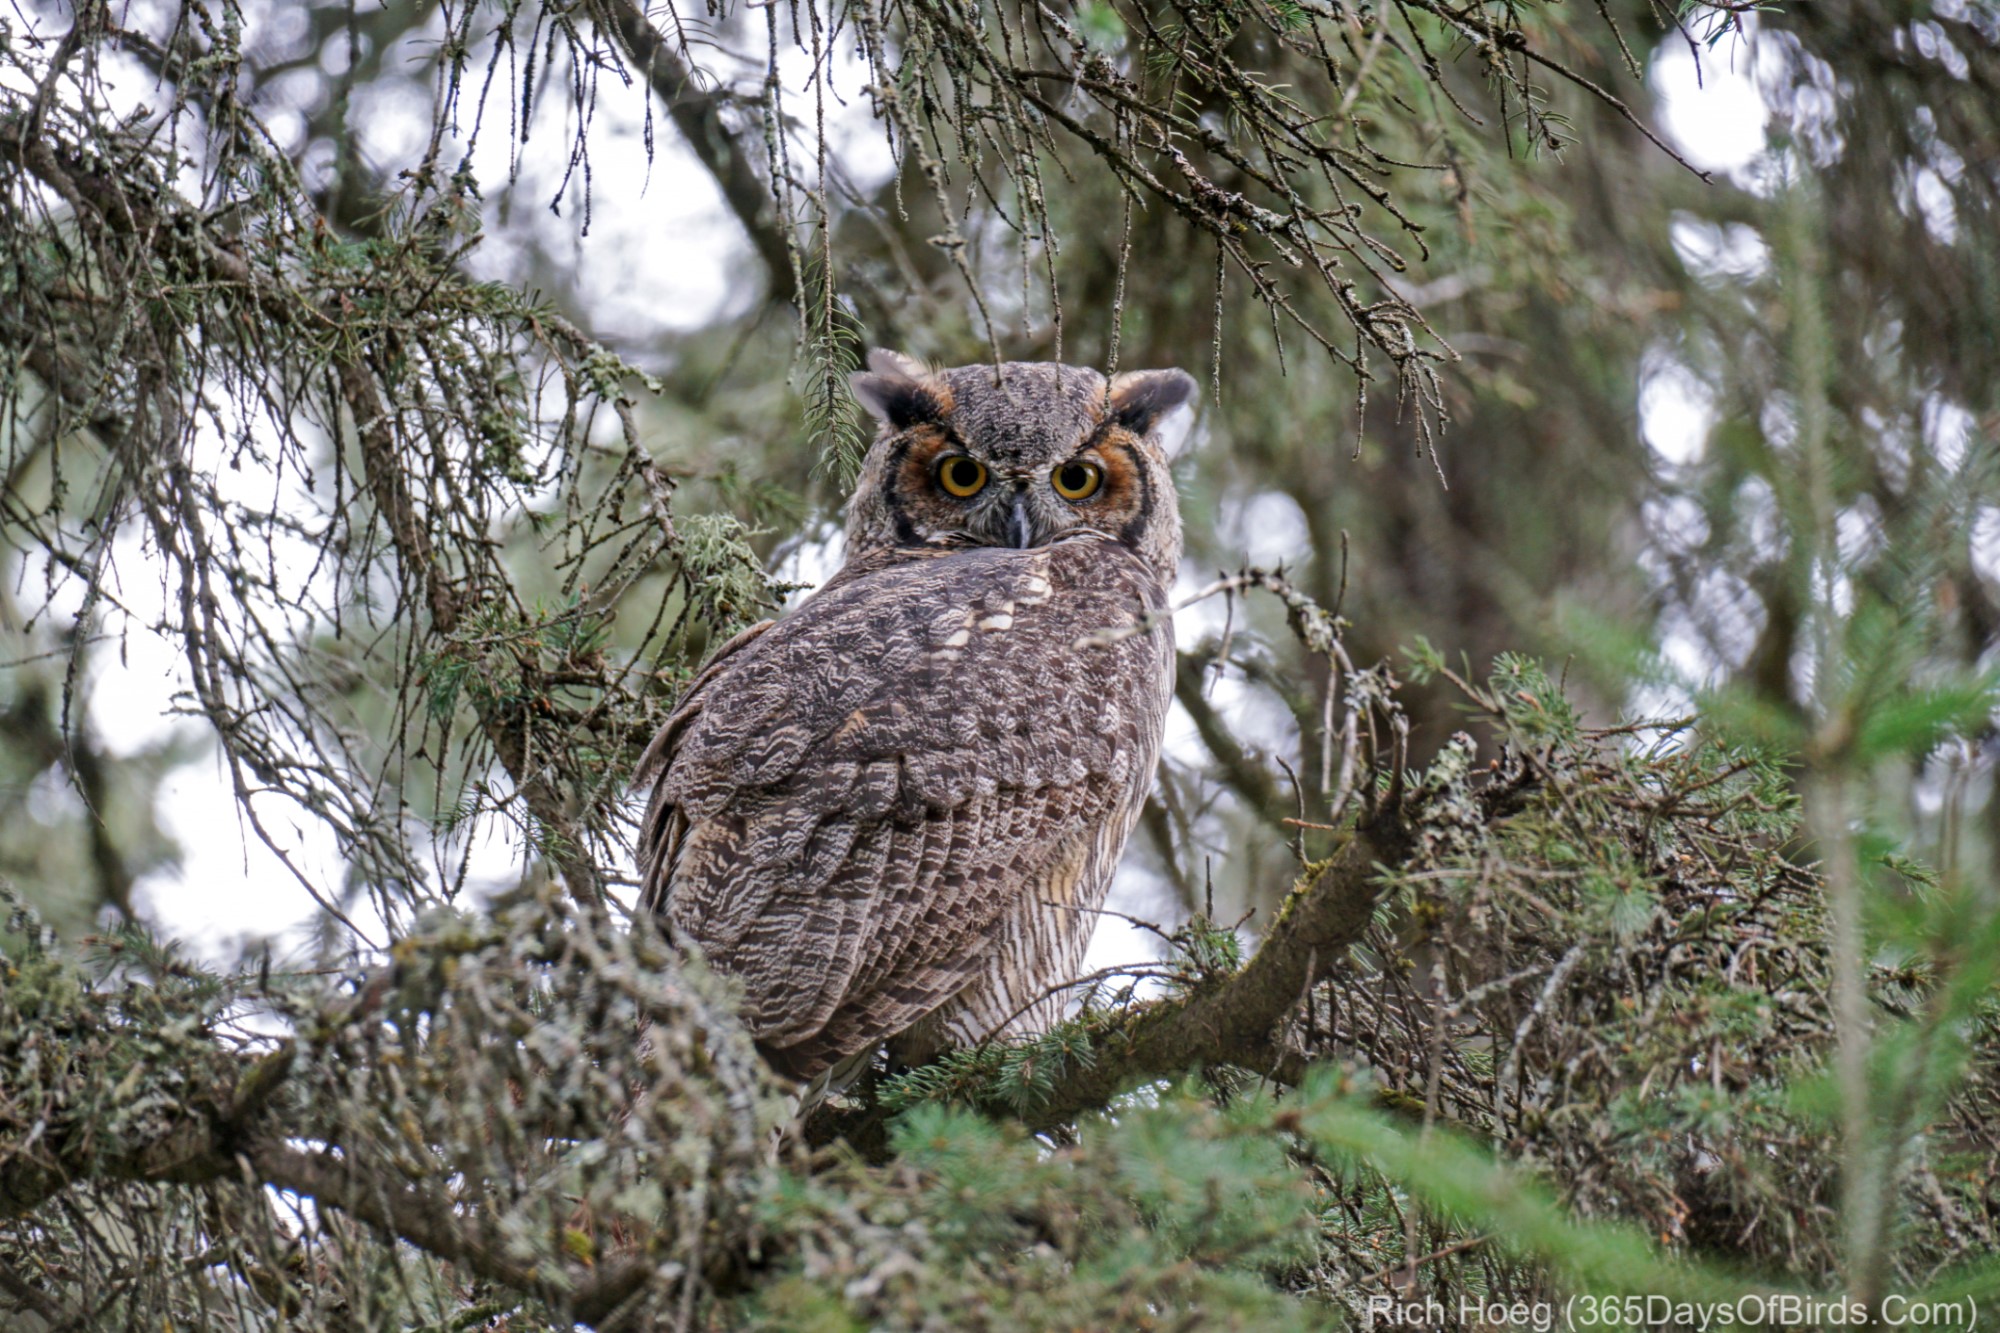
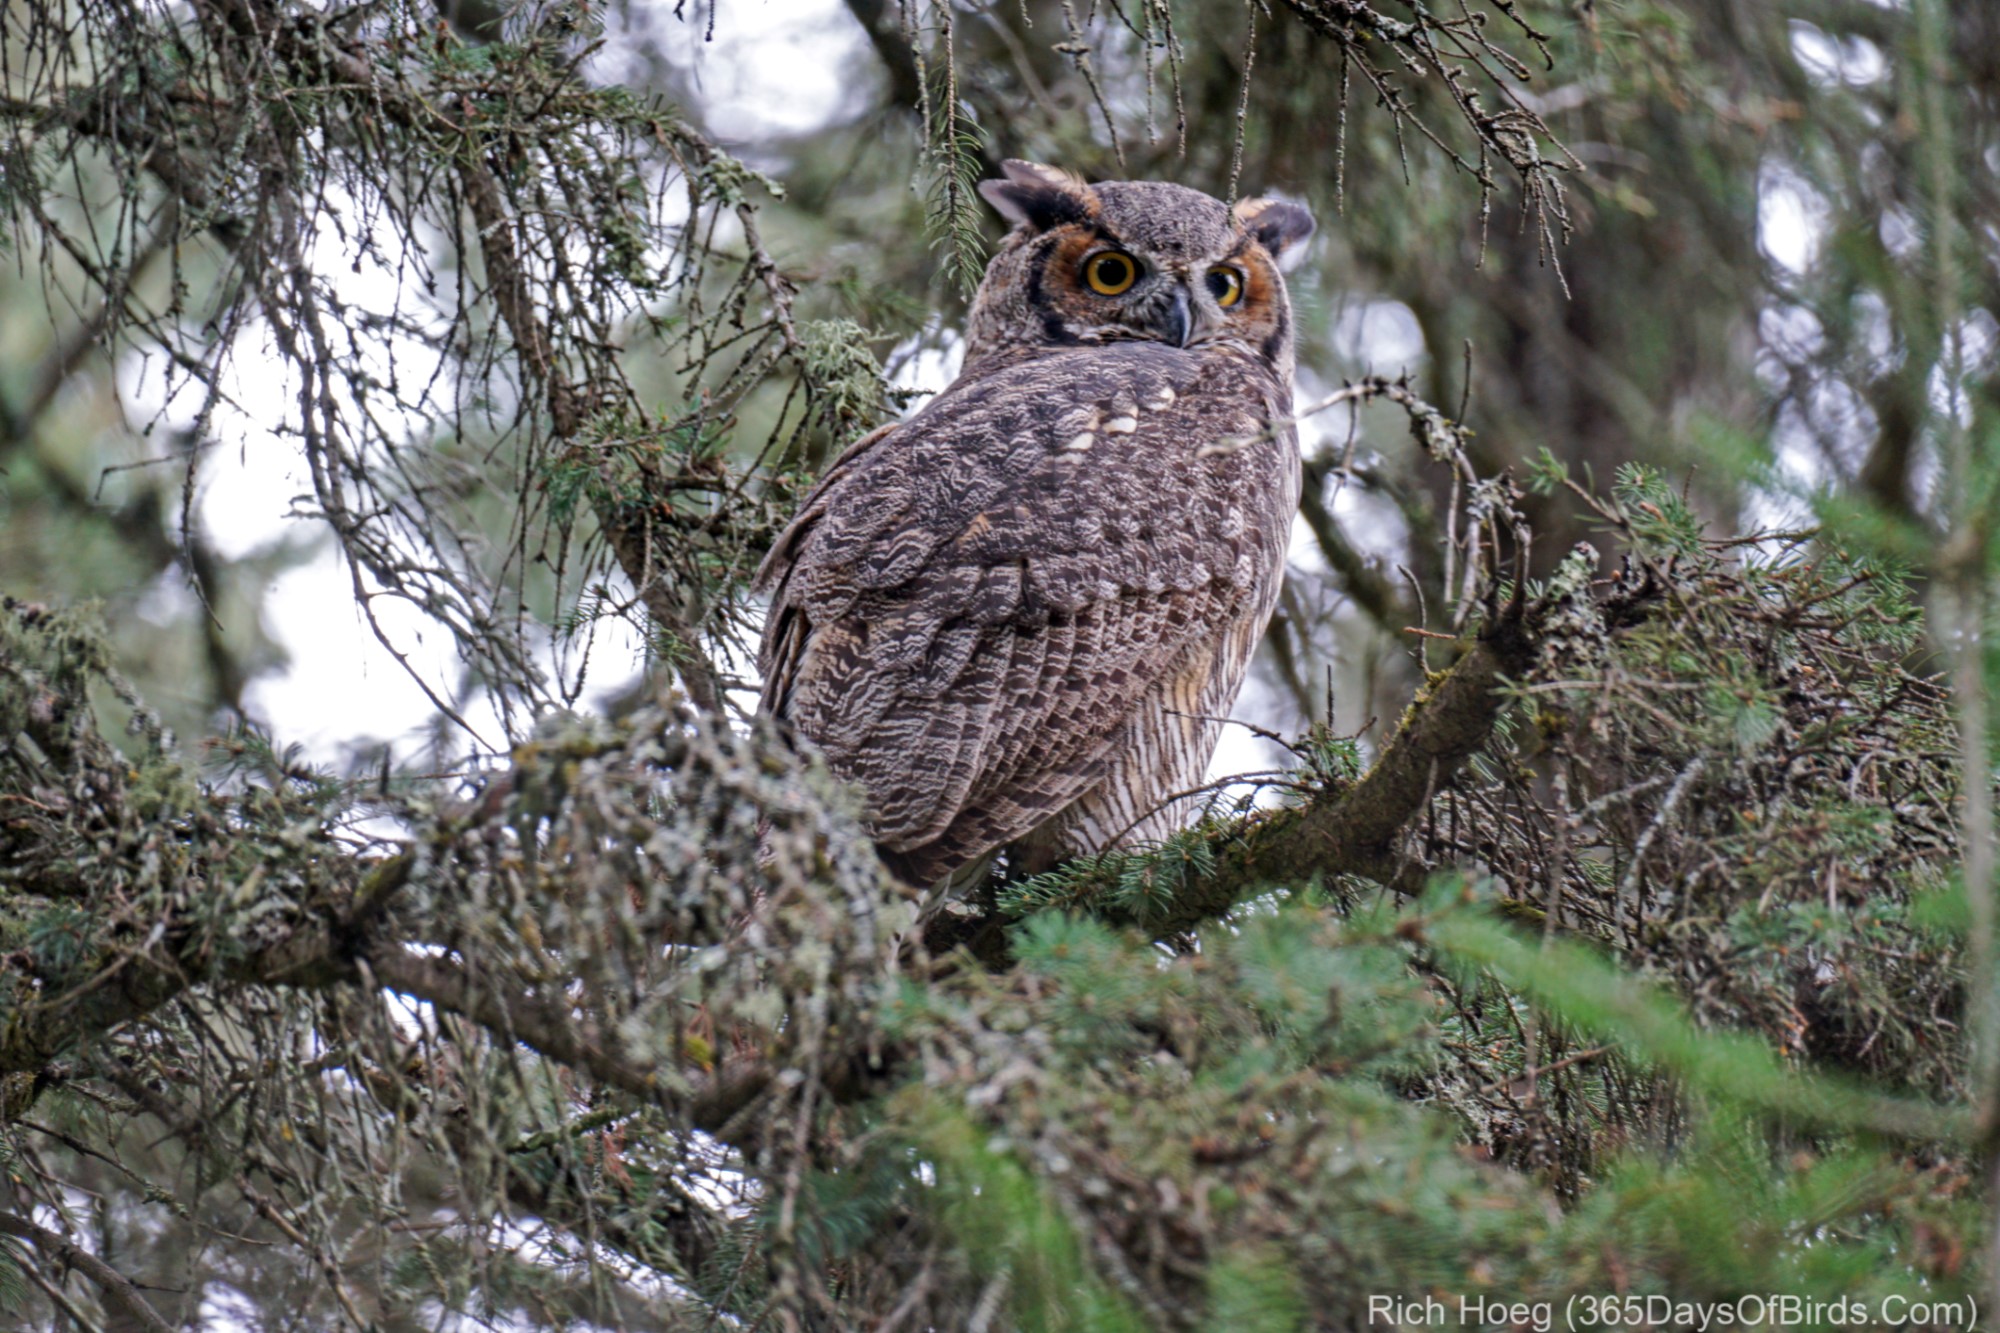
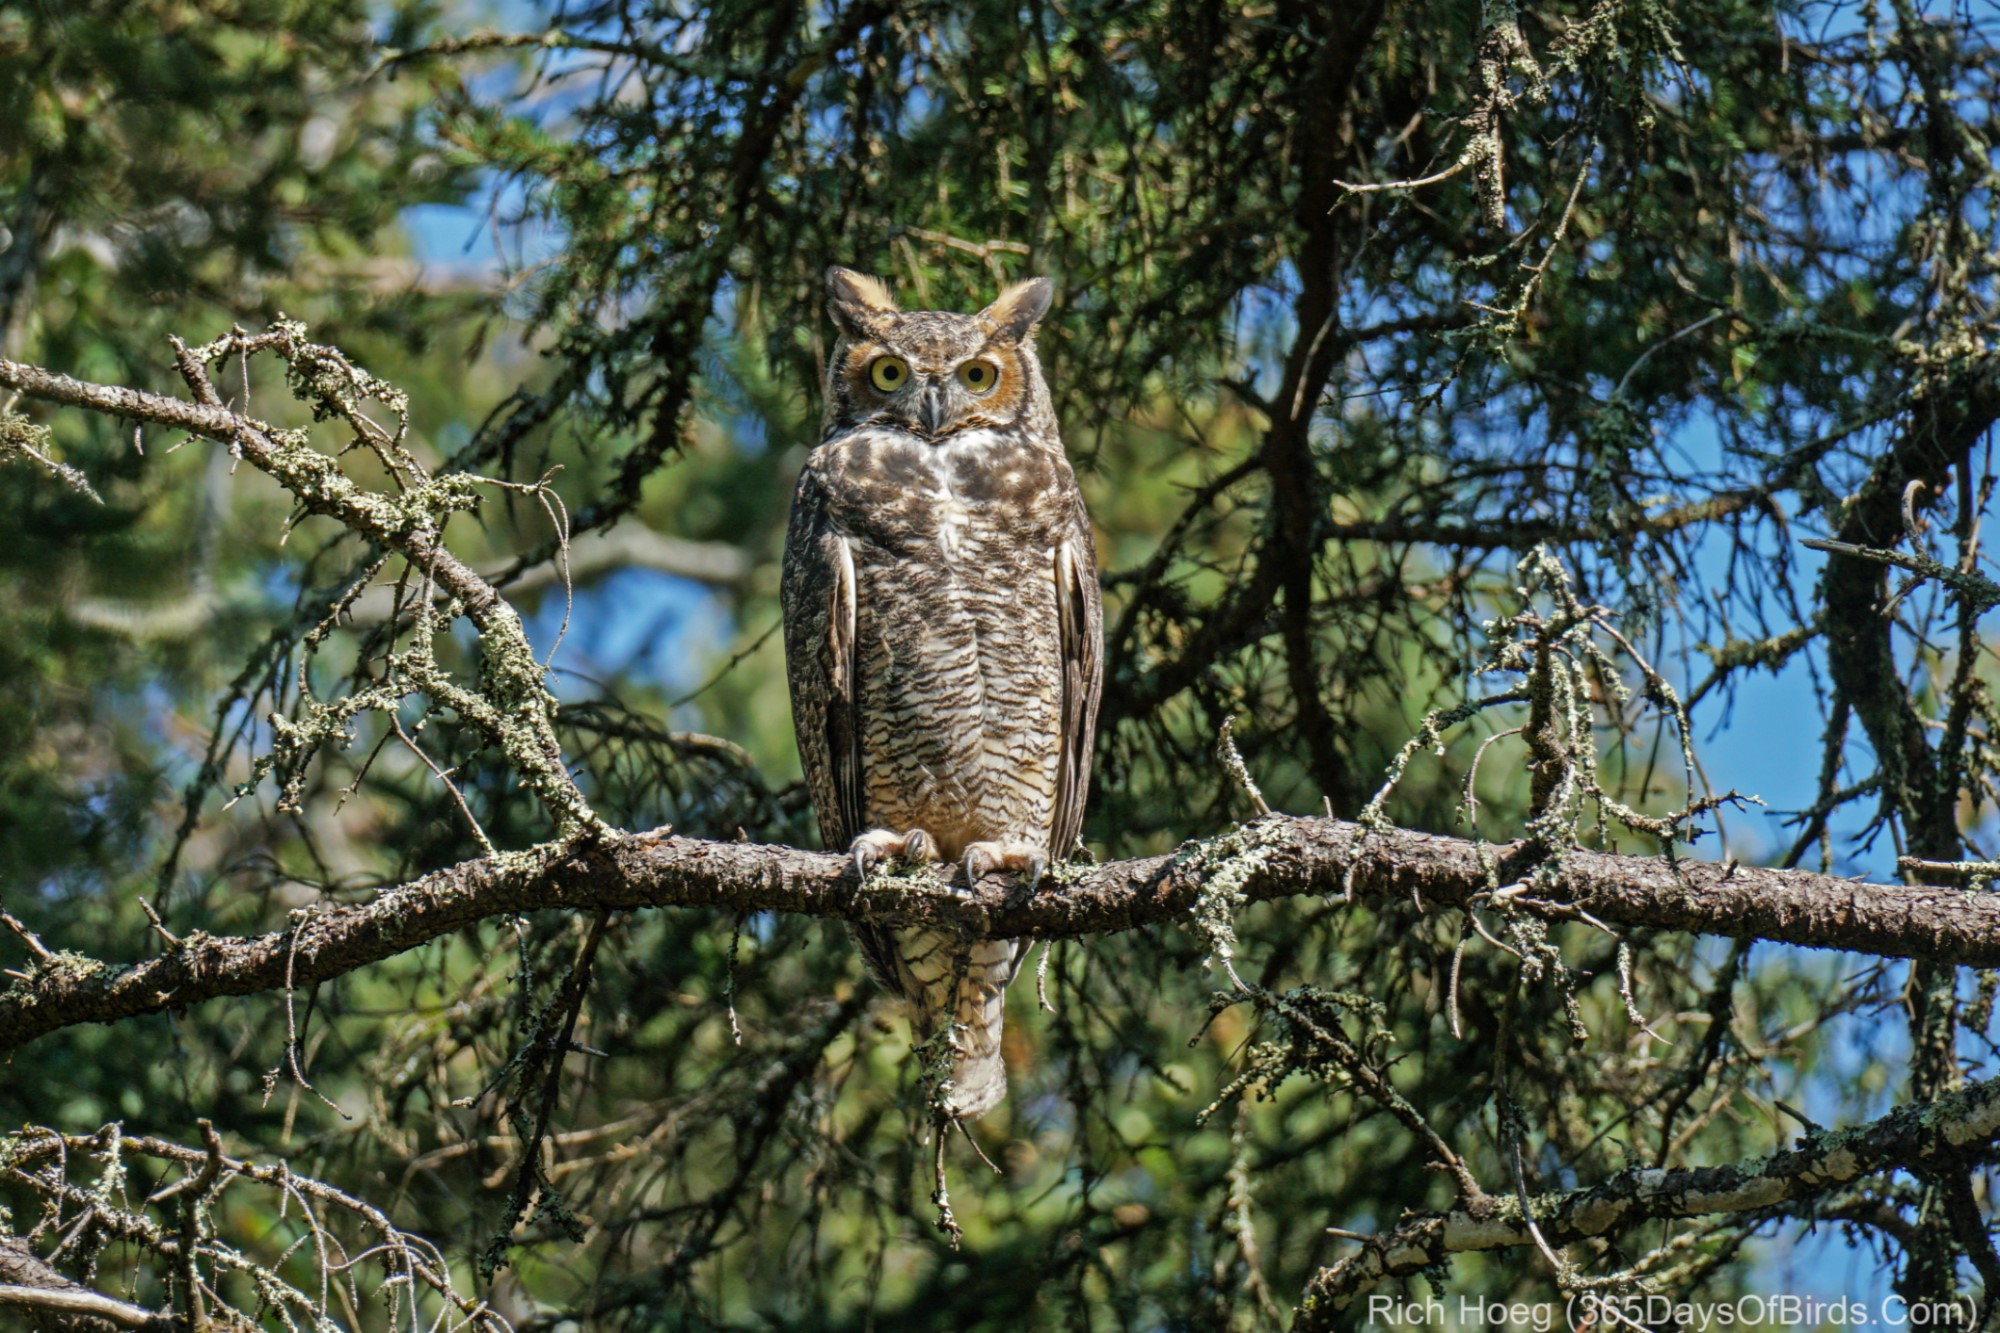
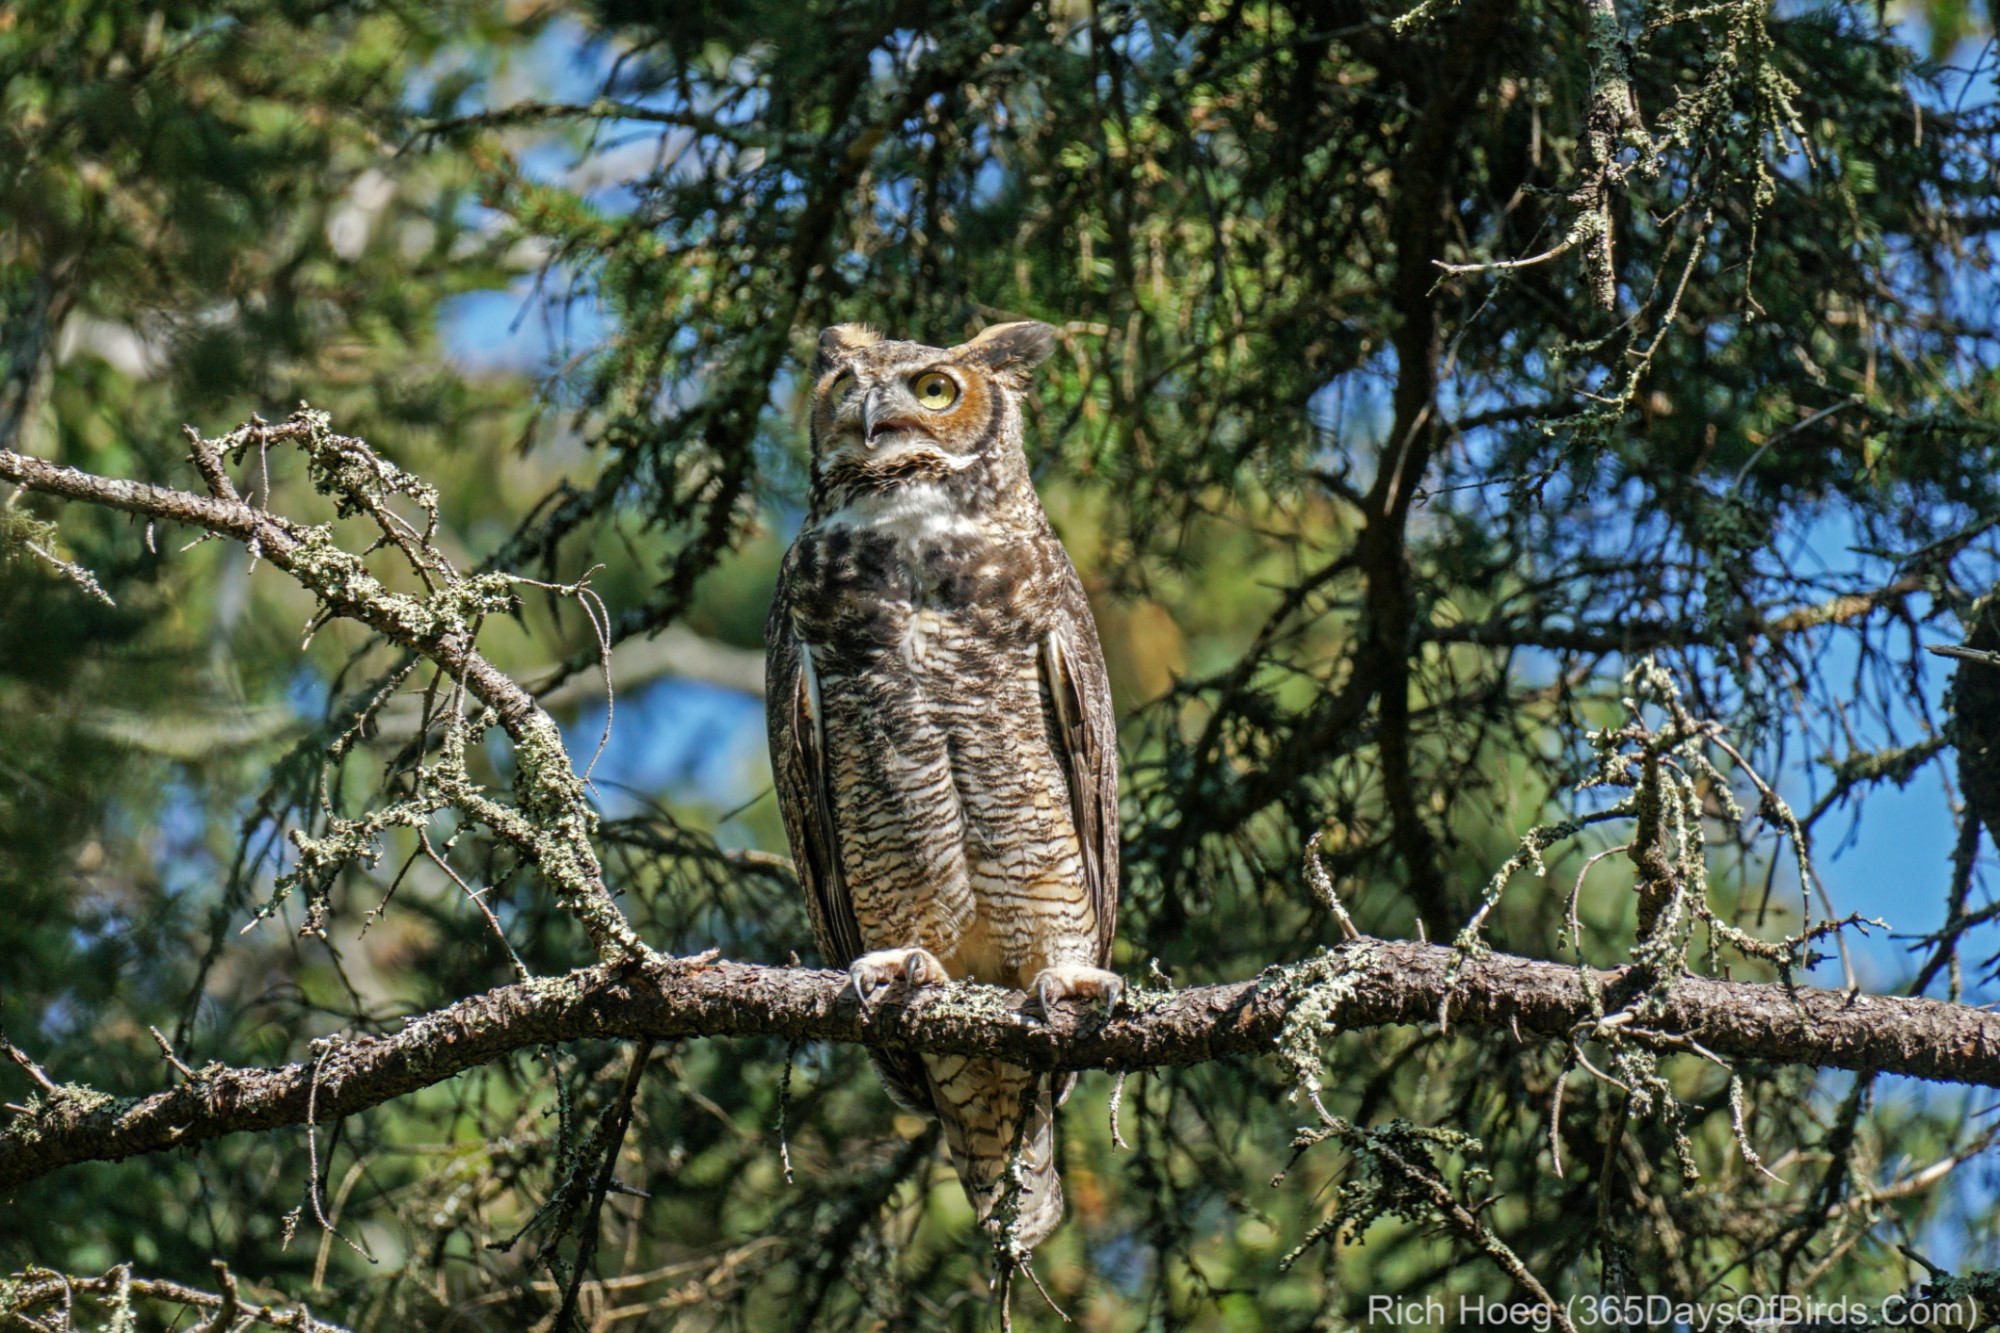
Hoot, the Great Horned Owl (cropped images)
Note: I never use digital zoom with any camera. It is better to decide in post processing if you wish to crop … the equivalent of digital zooming. Assuming an image has the depth to be cropped, it is better to make artistic decisions at a computer rather than in the field. A crop may be utilized to emphasize (or deemphasize any aspect of a photograph) in addition to giving a closer up view.
Before Image (non processed … Sony A6300) (Flickr High Res Link)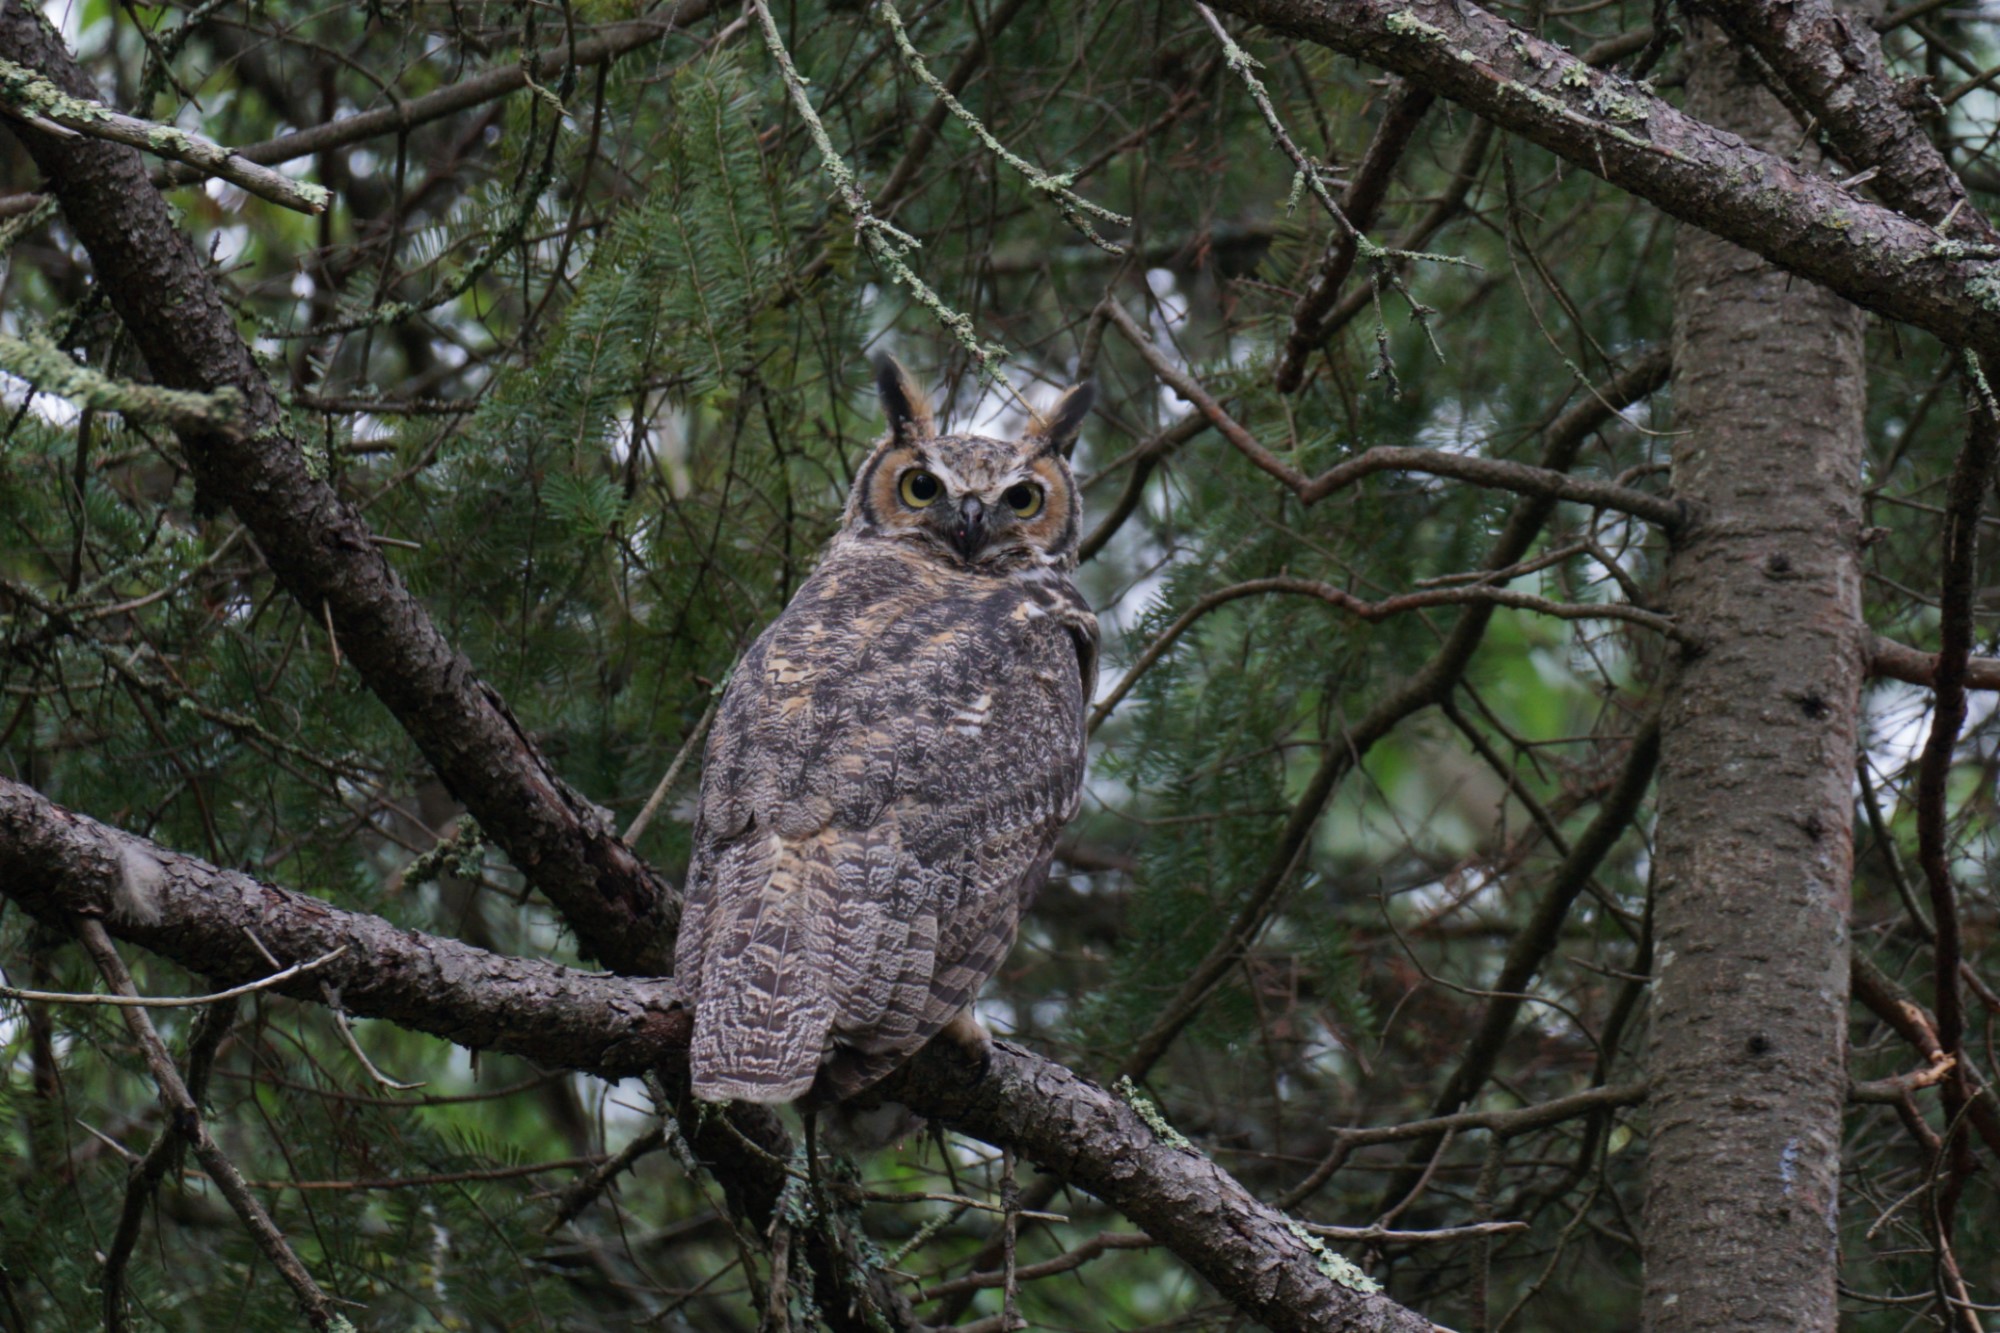
After Image (after the edits reviewed below) (Flickr High Res Link)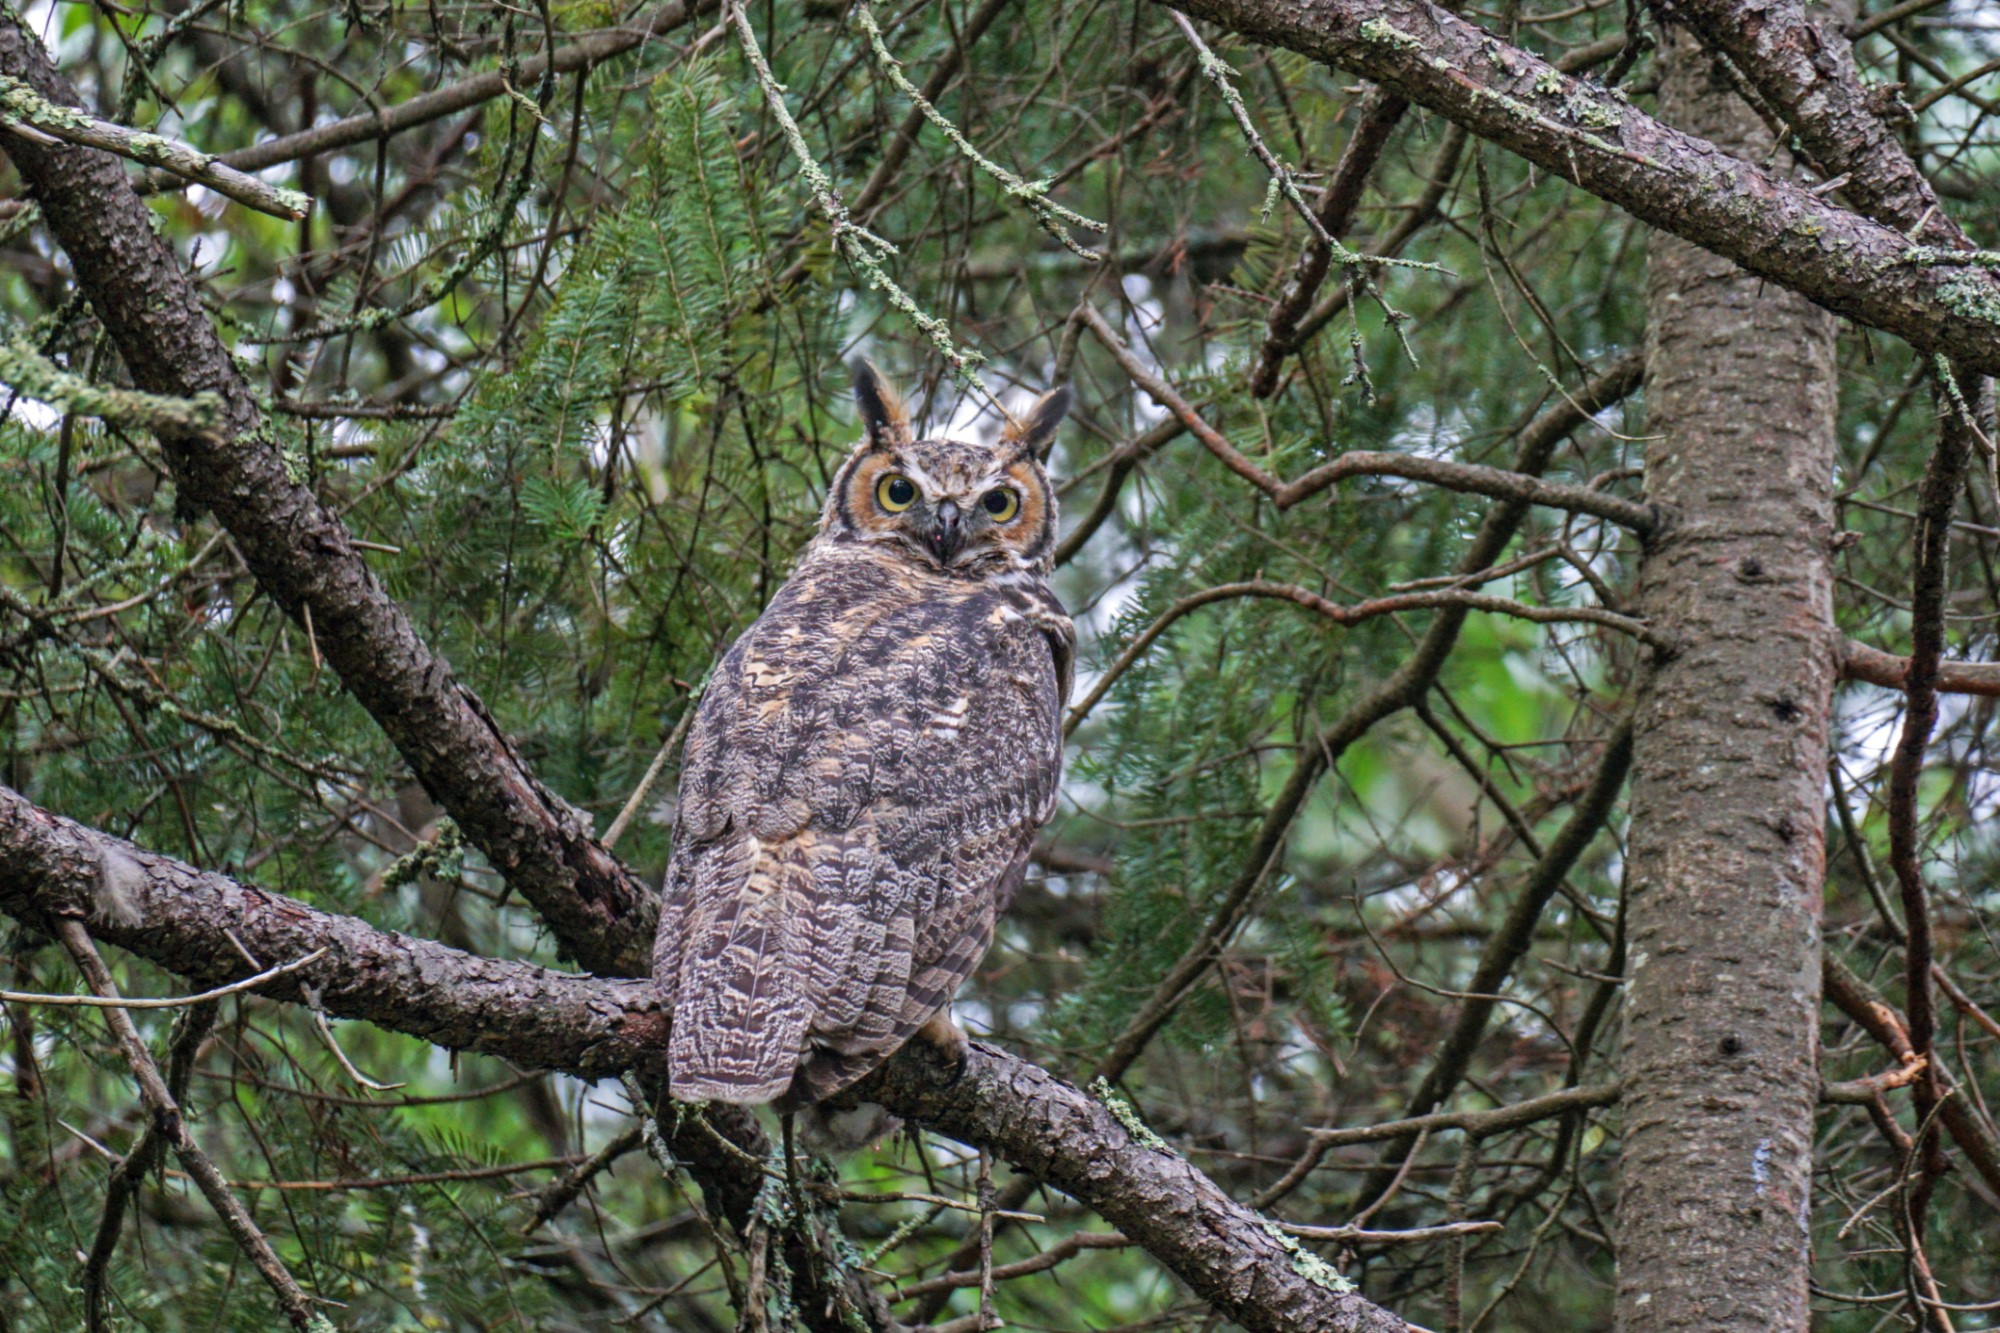
Photoshop Elements 2020 Software Image Editing
Step 1A: First I open my JPG image in Camera Raw. This is NOT a RAW file.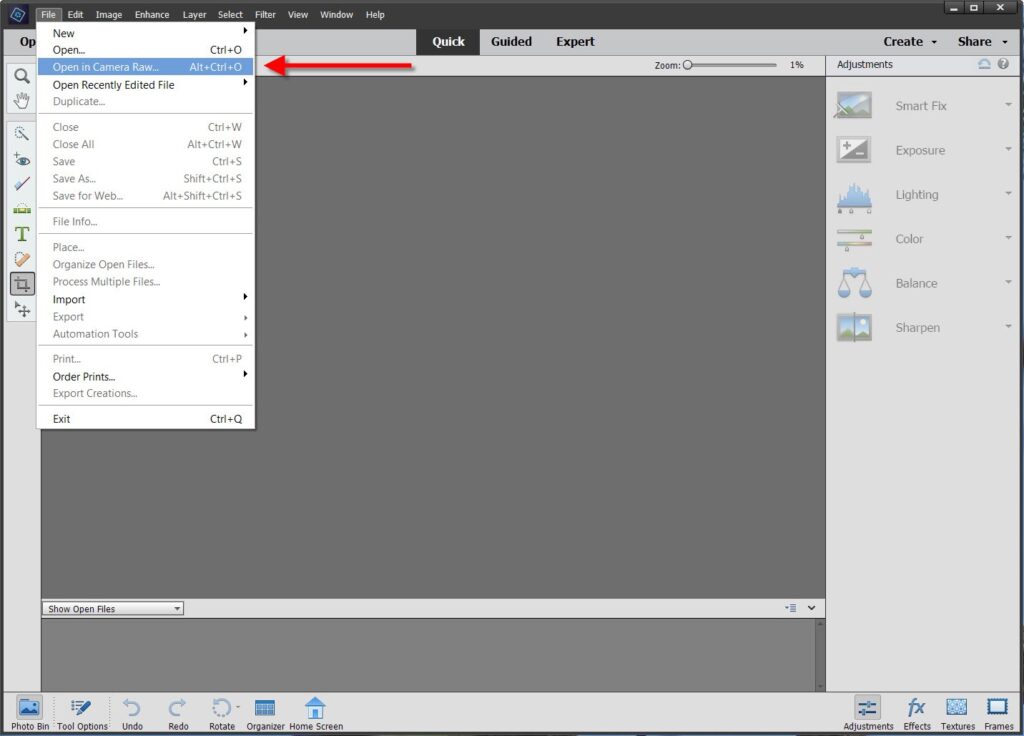
Step 1B: As part of the Camera RAW Open File Command, I am able to tweak attributes of the image. I have found for most photography that minor adjustments help. Normally I only adjust Clarity, Blacks and Whites. You are able to see the amounts I use as a maximum. The change will be immediately reflected in the image preview window. Given I like to underexpose, these adjustments help bring out a bird’s plumage.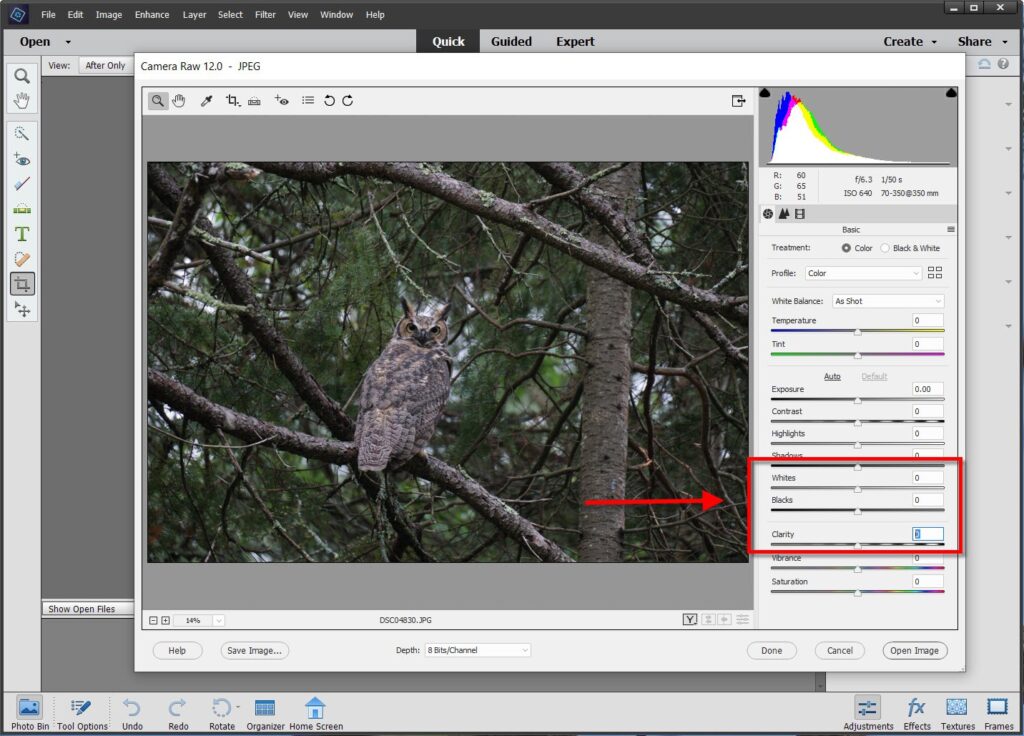
Step 1C: The final part of this step is to click Open Image, which now starts the actual editing process. One may always come back to the original file and change your settings to try a different approach.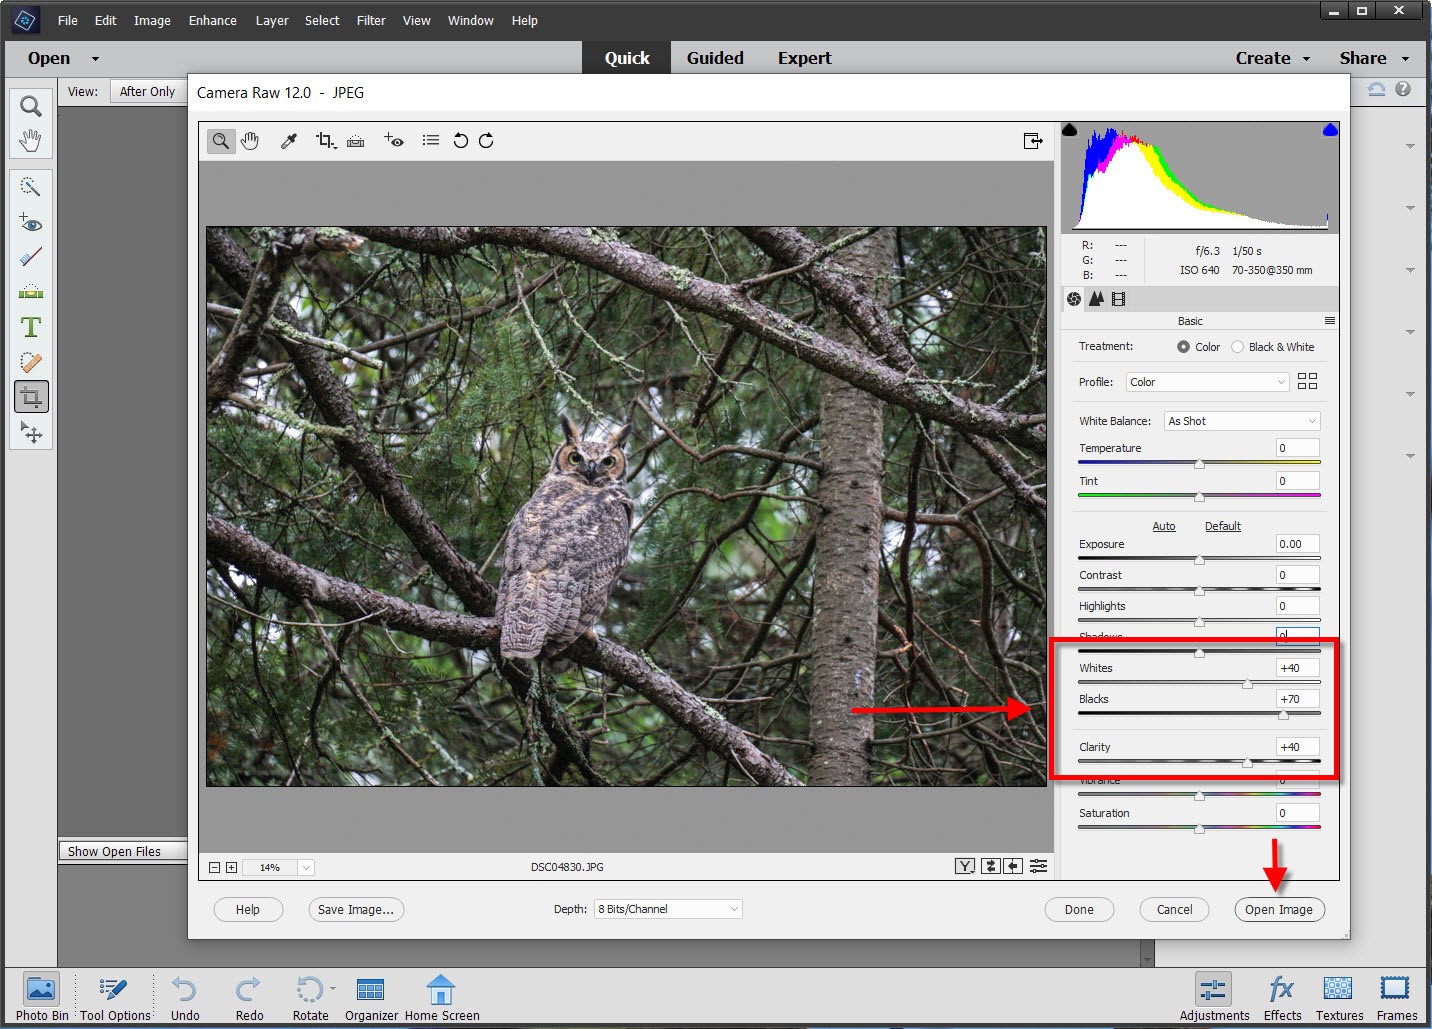
Step 2A: This is the first part of my actual editing process. I work with Shadows and Highlights, and almost never make adjustments of more than one quadrant in the “Quick Mode”. Remember while making these edits, the image preview window will reflect your changes, and one may Undo any selection. Thus, I try a setting and observe the results.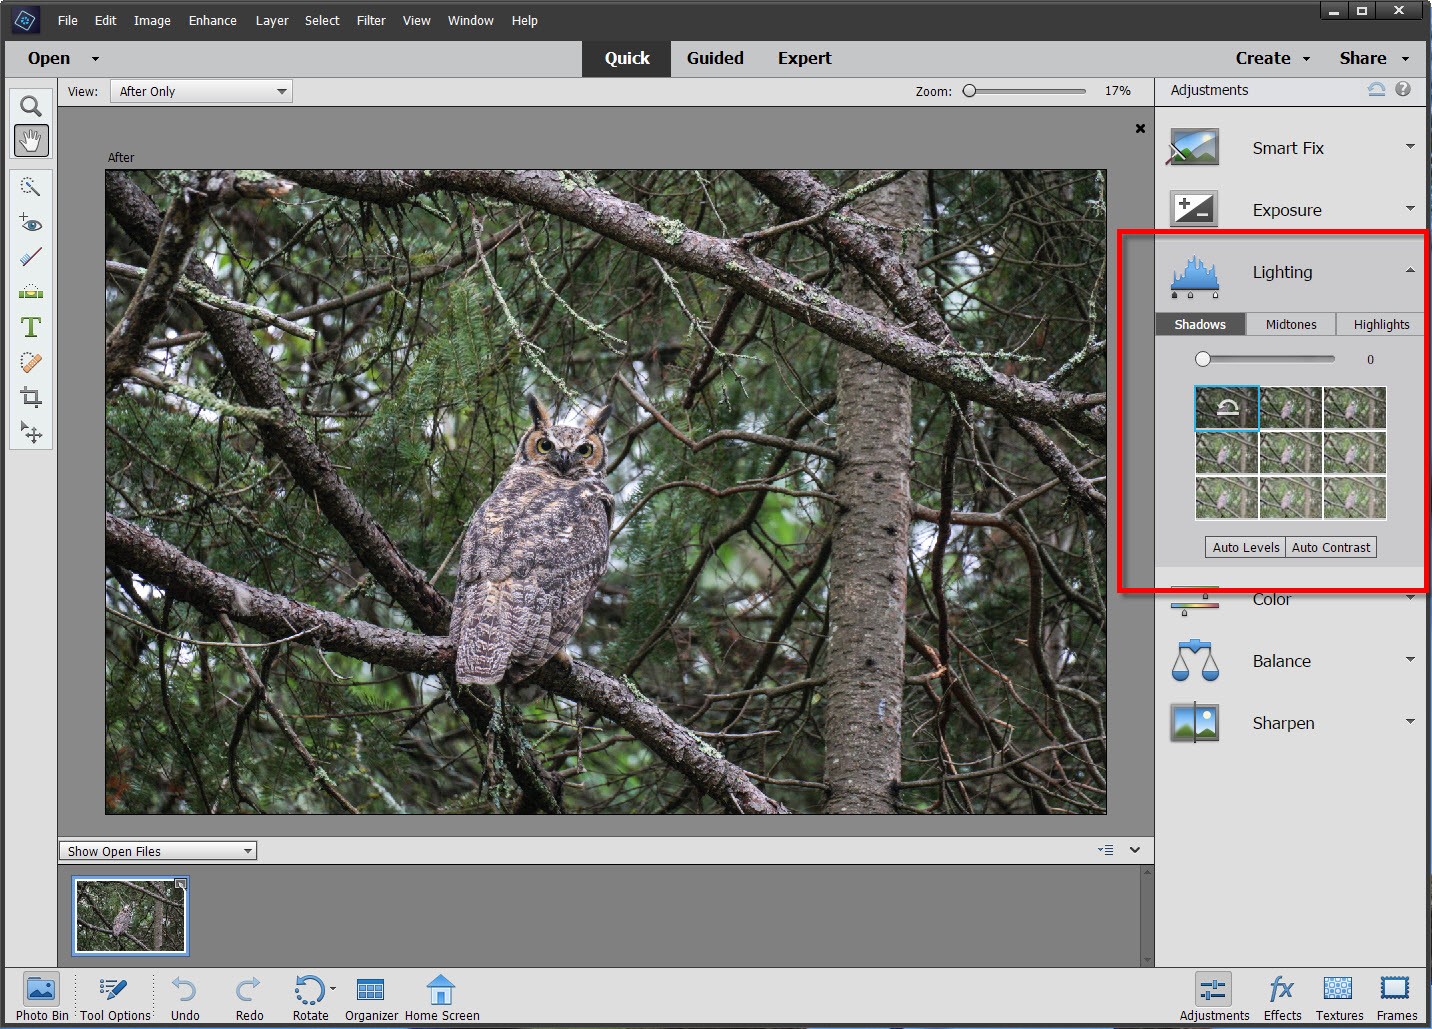
Step 2B: Working with Shadows.
In all cases while creating this post, I took and annotated my screenshots after issuing a Photoshop Elements command. Thus, pay attention to how the owl image changes through these eleven steps … start to finish. Remember, the 100% before and after images are found above the editing images.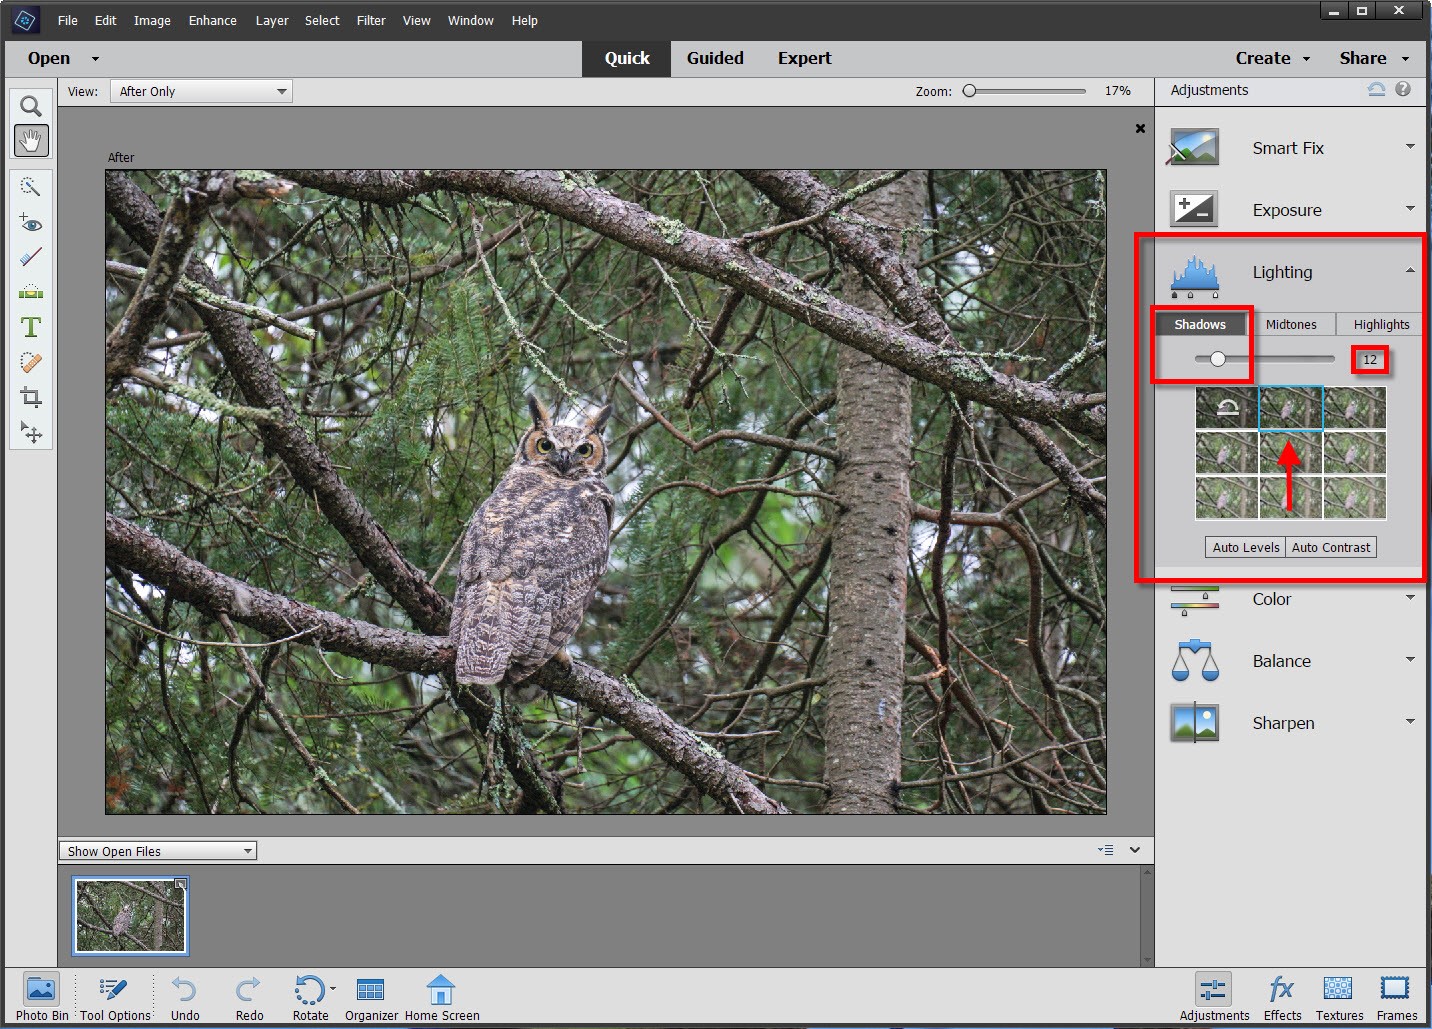
Step 2C: Working with Highlights
Step 3A: There are quite a few possible enhancements. I generally only work with the three noted” Auto Levels (amount of lighting), Auto Contrast (often makes images a bit more vivid) and Shake Reduction (only works for small amounts assuming the image was already in focus)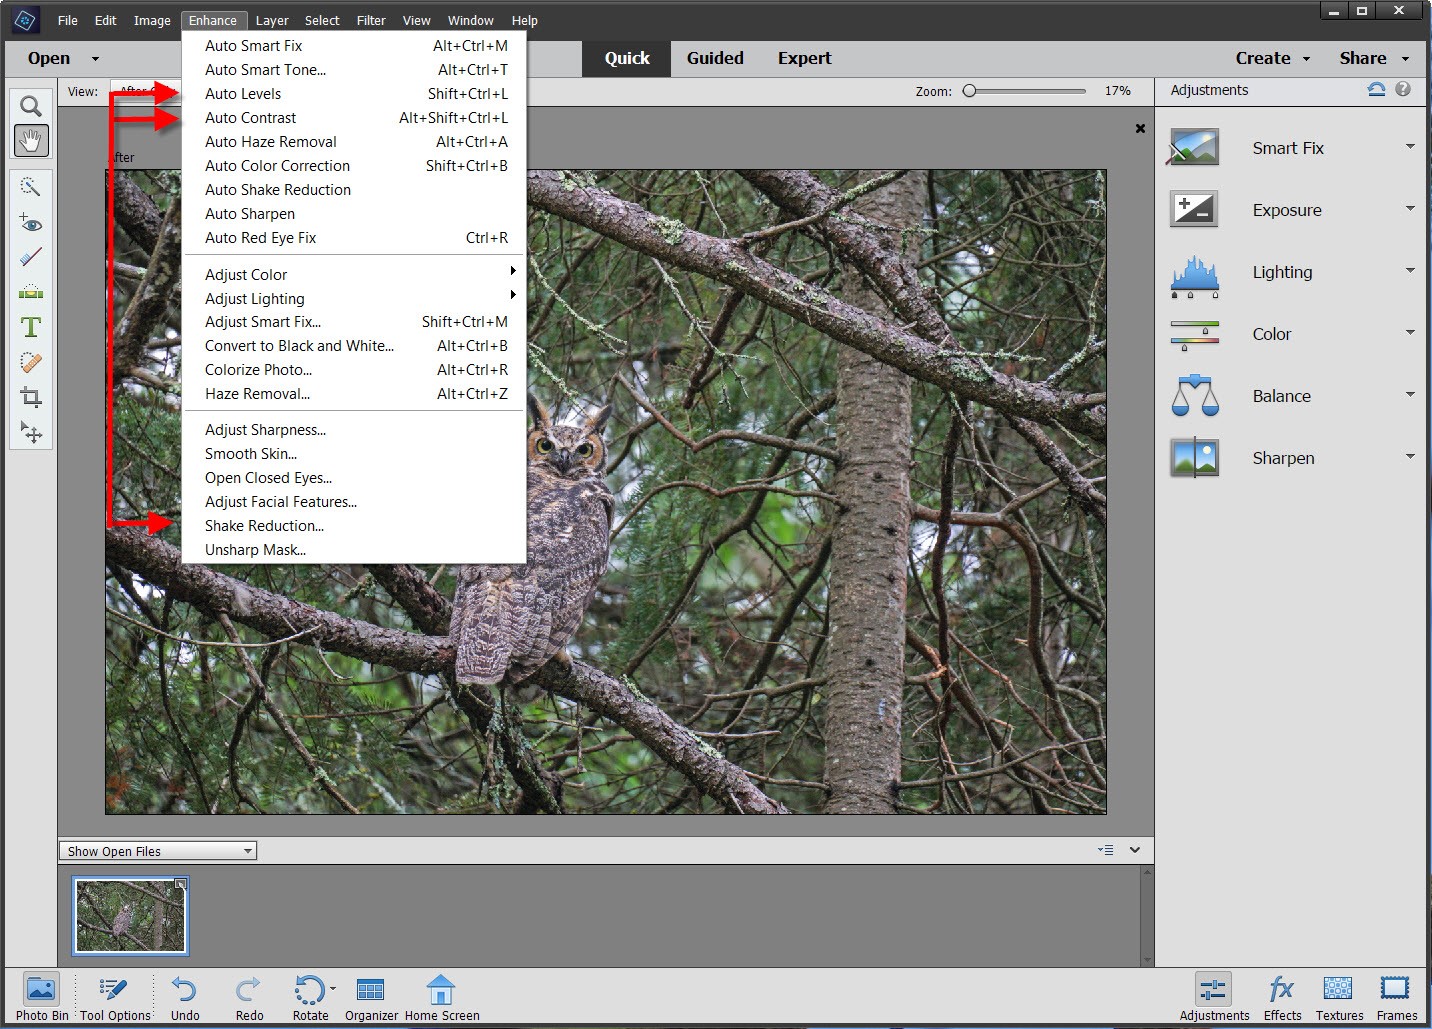
Step 3B: Remember the Undo Command! I try an enhancement and if I don’t like the end result … Undo.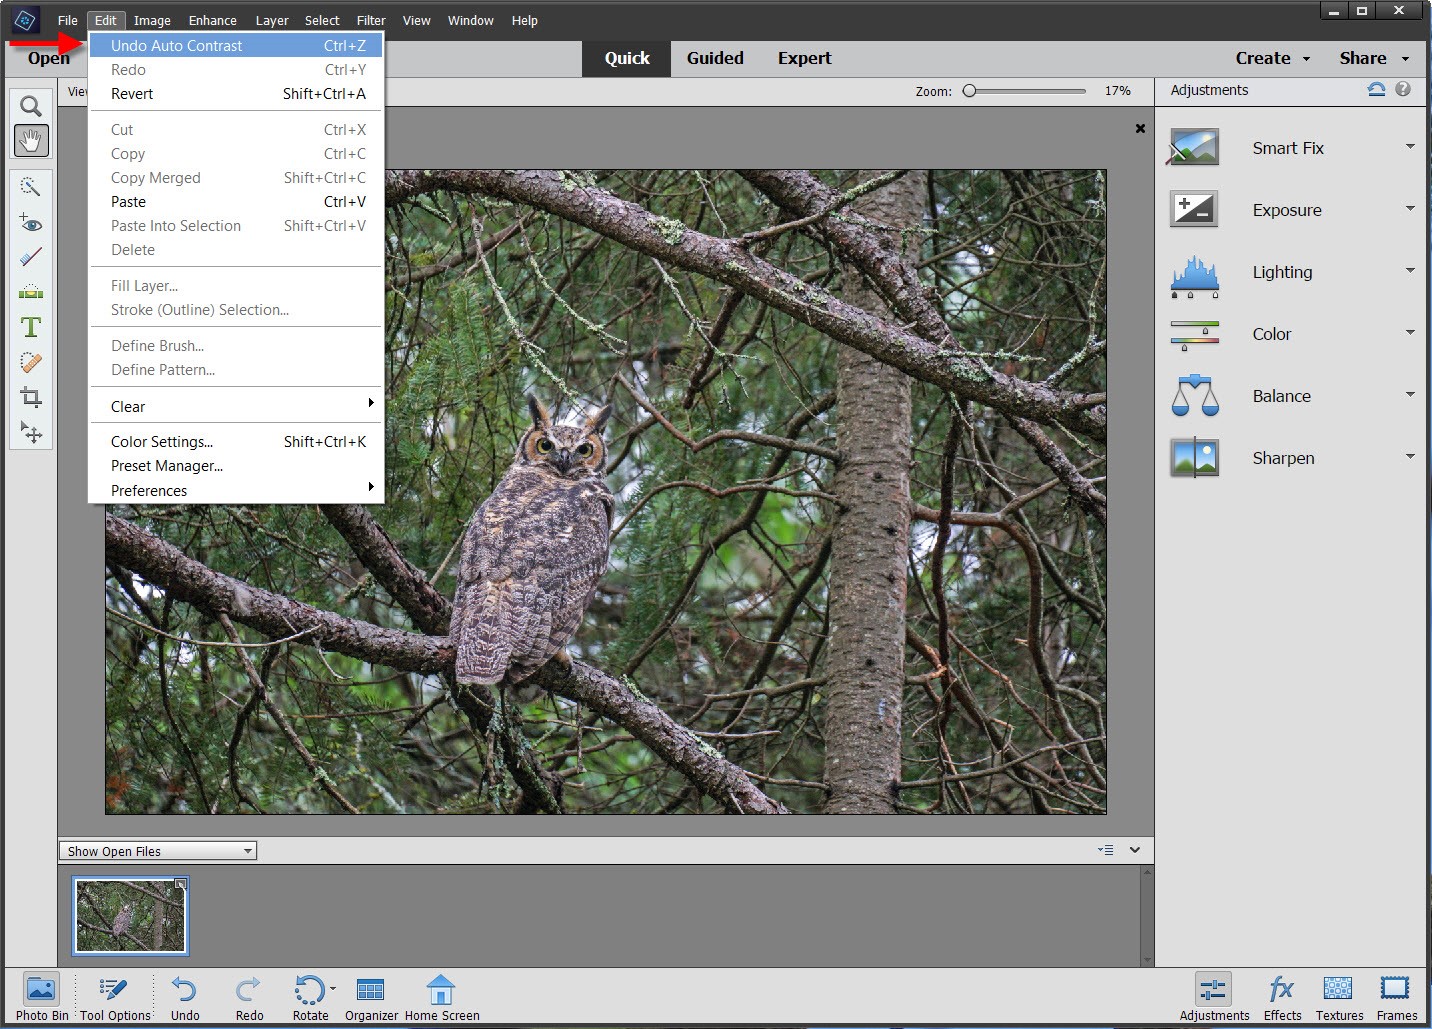
Step 4A: Minor, Minor Tweaks! Often the exposure of an image will have regions of the photograph where the camera did not capture everything as desired. Using the Magic Wand with the noted Quick Setting it is often possible to select a very small region. I use this process for small lighting adjustments.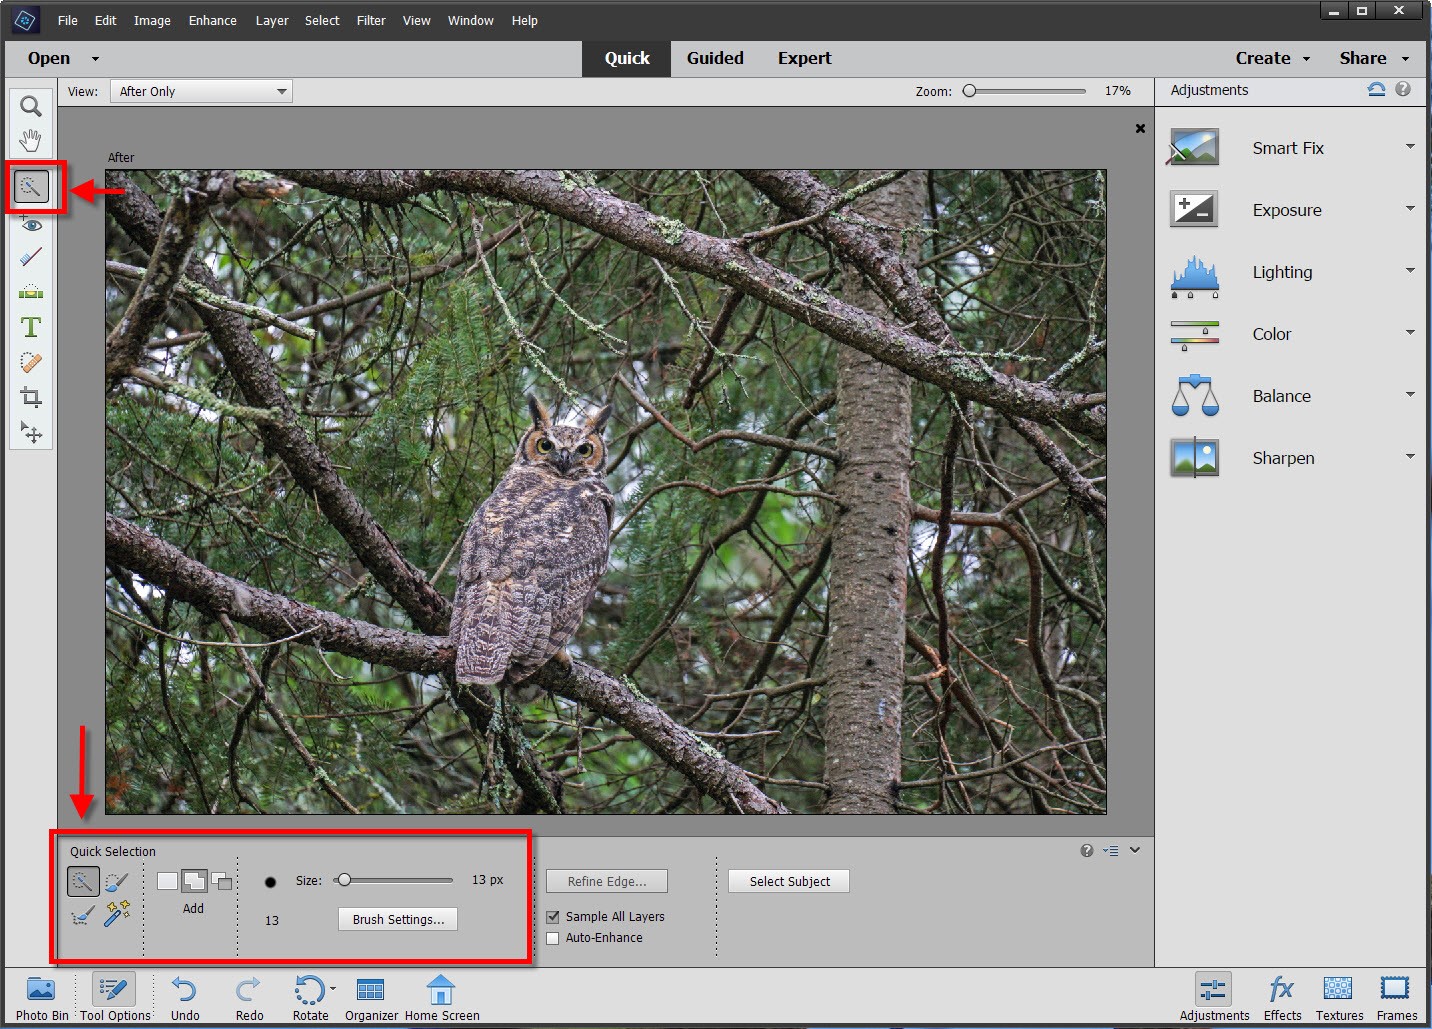
Step 4B: Hard to see, but I have selected the owl’s eyes. On a full sized screen you would see dashed lines around the owl’s eyes letting me know I am ONLY working with that region of the photograph.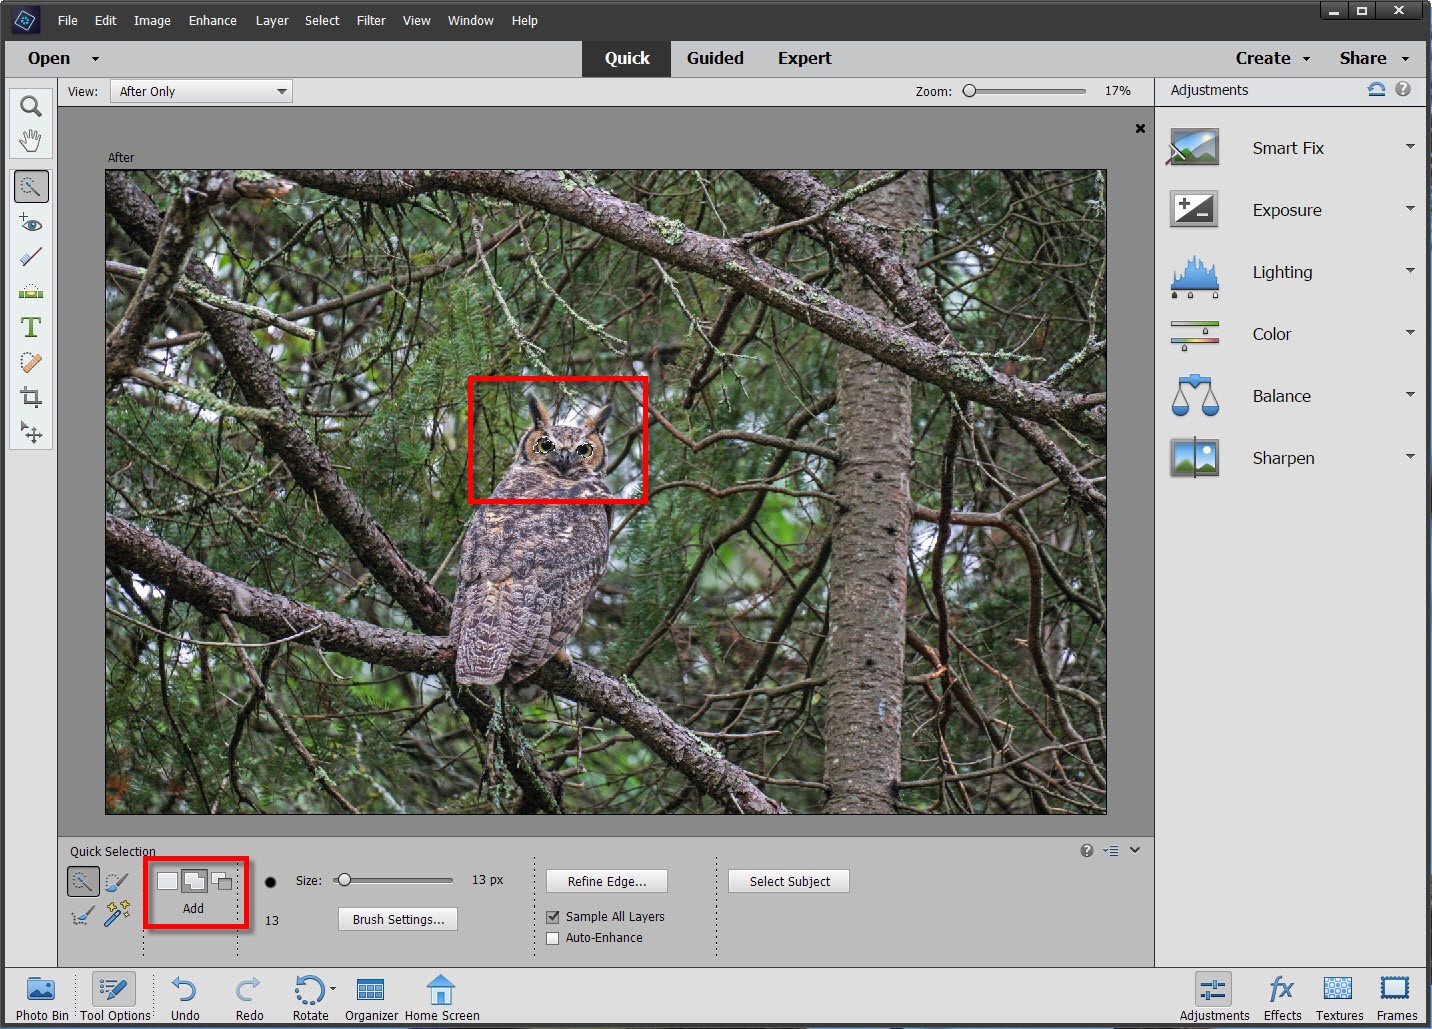
Step 4C: Making a minor tweak to Shadows … only applied to the owl’s eyes. In this instance it makes the owl’s eyes stand out a touch more. However, remember reality!!! My photography is a “realistic approach”. While there is nothing wrong with larger adjustments, the end result will not look like what a person actual saw in the field.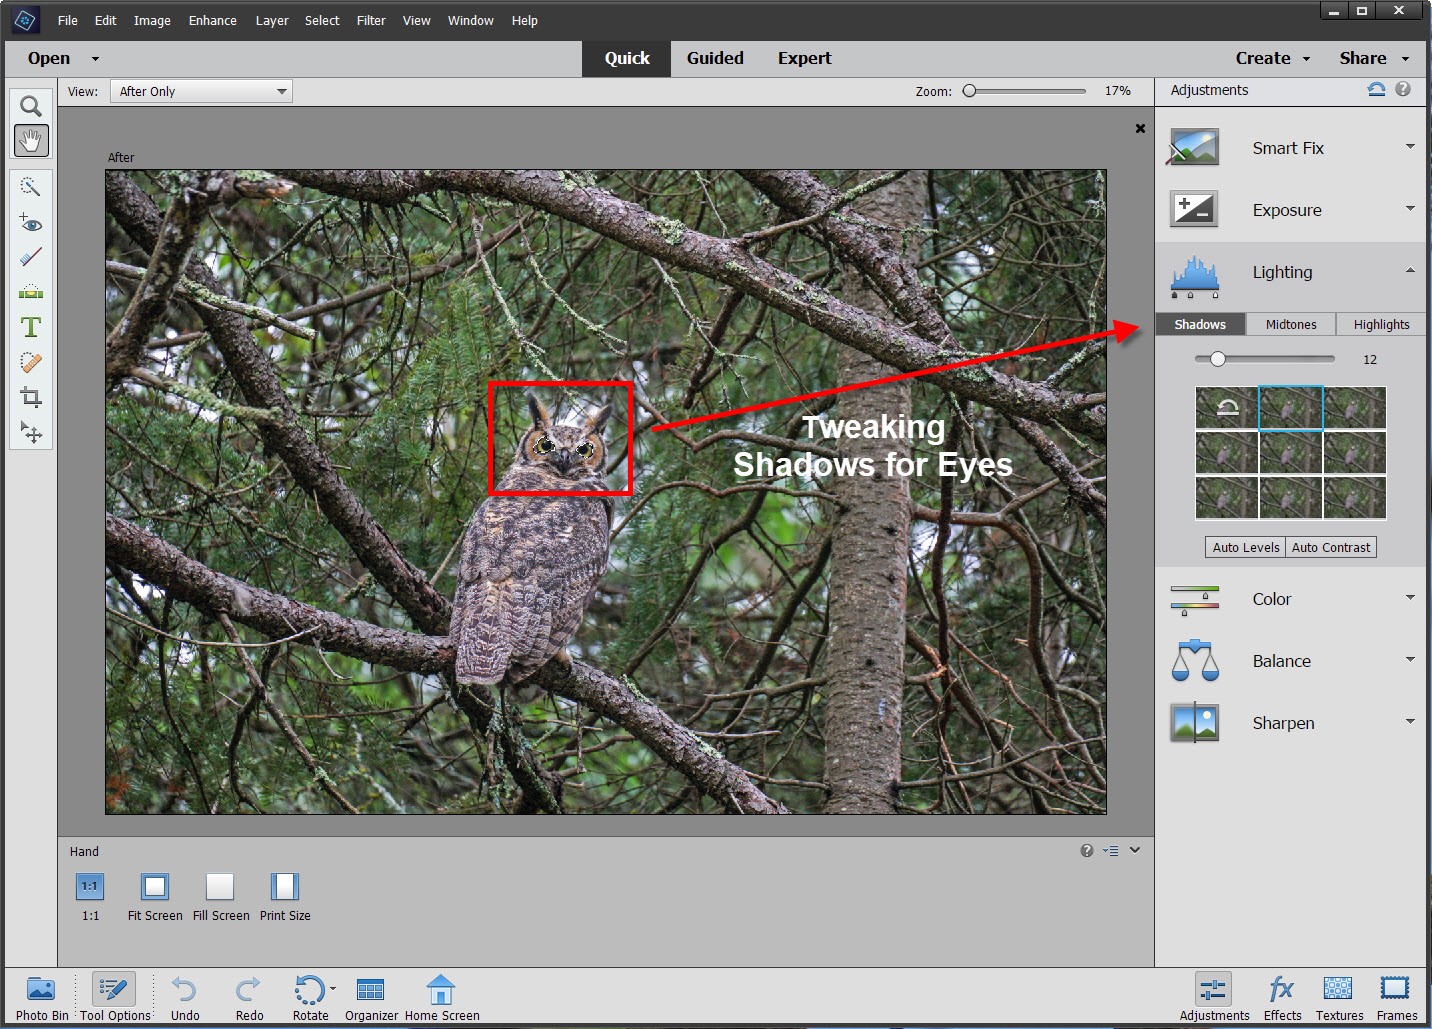
In summation, there are an infinite number of edits that one may perform with photo editing software. However it is impossible to edit a poor photograph to make a good end image. If your picture in the camera is sub optimal, no amount of editing can change that reality.
Photography is an art, and photographers have different levels of post processing they like to utilize. I tend to be a minimalist which takes into my account to my preference to underexpose photographs. That approach then allows me to use lower ISO’s and faster exposure times. Finally, I almost always use a lightweight monopod in the field. While camera anti-shake technology is very good, starting with a 100% motionless platform is much, much better.